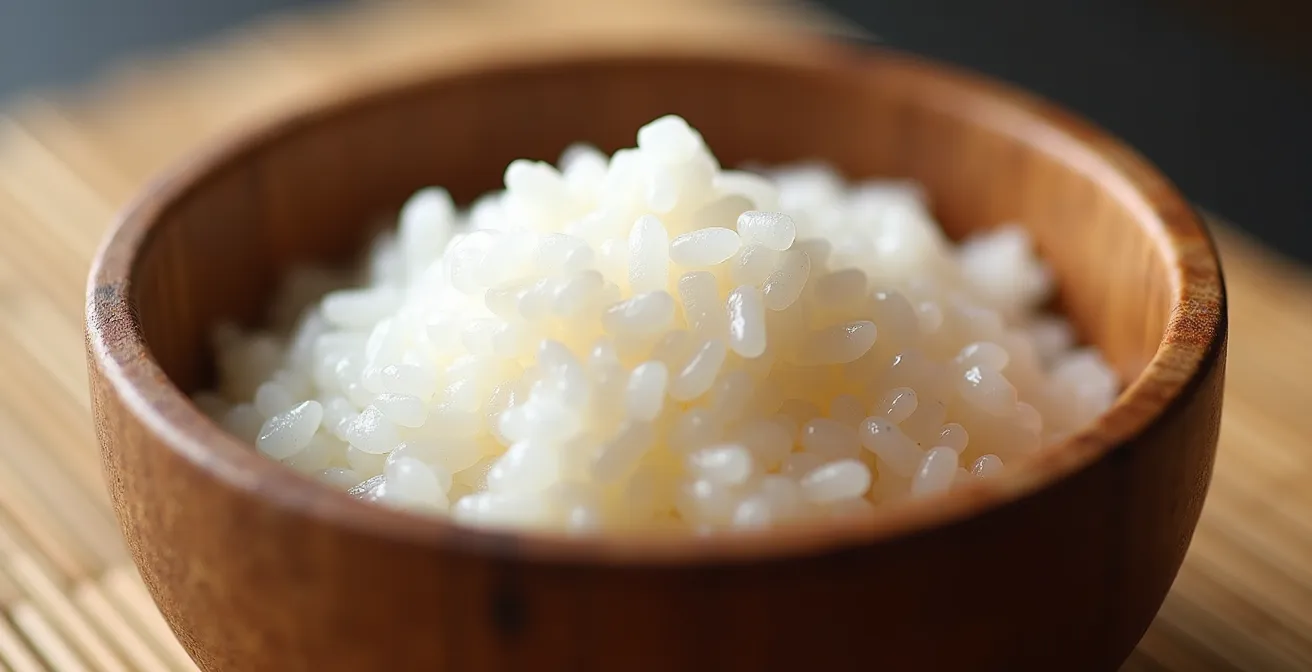
The frustrating dullness of homemade sushi rice isn’t a single failure, but a breakdown in its “skin health.” Achieving that coveted gloss is not about a secret ingredient but about mastering the chemical and physical interactions between sugar, vinegar, and starch. It requires precise thermal management and moisture control to create a stable, crystalline coating on every single grain, transforming it from a matte base into a luminous final product.
You’ve followed the recipe meticulously. You procured the right short-grain Japanese rice, washed it until the water ran clear, and cooked it with precision. Yet, as you fold in the sushi vinegar, the transformation you anticipate—the birth of glistening, jewel-like shari—never happens. Instead, you’re left with a bowl of rice that looks disappointingly matte, dry, and lifeless. It’s a common frustration that separates amateur efforts from professional results, a visual cue that something fundamental has gone wrong. Many cooks assume the issue lies in the brand of vinegar or the quality of their rice cooker, but these are rarely the primary culprits.
The conventional wisdom often circles around simple instructions: “add vinegar,” “fan the rice,” “mix gently.” While correct, this advice misses the crucial underlying science. The gloss on sushi rice is not a mere surface treatment; it is the visible result of a delicate chemical process, a kind of food aesthetician’s art. It’s about creating a perfect, microscopic veneer on each grain. This involves understanding the role of sugar as a crystallizing agent, the physics of rapid evaporative cooling, and the specific starch chemistry of your chosen rice variety. It’s a process where timing, temperature, and technique converge to create a state of perfect “rice skin health.”
But if the secret isn’t a single ingredient, what is it? The truth is that achieving that lustrous sheen is a holistic discipline. It’s about protecting the integrity of the starch matrix while encouraging a stable, glassy coating to form. This guide moves beyond the basic steps to diagnose the problem at a molecular level. We will explore the precise role of each component and action, treating your rice not as an ingredient to be seasoned, but as a delicate surface to be perfected. By understanding the science, you can finally move from guessing to knowing, and consistently produce sushi rice with the brilliant gloss it deserves.
This article breaks down the aesthetic science of sushi rice into its core components. Follow along to diagnose why your rice lacks luster and learn the techniques to achieve a perfect, glossy finish every time.
Summary: Why Does Your Sushi Rice Look Dull Instead of Glossy?
- Does Sugar Content Affect the Shine of the Rice Grains?
- The Window of Gloss: Why Over-Fanning Makes Rice Look Matte?
- Should You Add a Drop of Oil for Shine (and Is It Authentic)?
- Koshihikari or Sasanishiki: Which Strain Retains Gloss Longer?
- How Long Can Rice Sit in the Ohitsu Before Losing Its Luster?
- Why Must You Fan the Rice While Mixing the Vinegar?
- How to Use a Wooden Ohitsu to Regulate Rice Humidity and Heat?
- How to Shape Hand-Pressed Sushi Rice Without Crushing the Grains?
Does Sugar Content Affect the Shine of the Rice Grains?
Absolutely. From a food aesthetician’s perspective, sugar is not just a flavouring agent in sushi vinegar (sushi-zu); it is the primary component responsible for creating the crystalline coating that gives sushi rice its signature luster. When the hot, cooked rice is mixed with the vinegar solution, the sugar dissolves and coats each individual grain. As the rice cools, this sugar-vinegar mixture forms a thin, glossy veneer. Without adequate sugar, the surface of the rice remains porous and matte, unable to reflect light effectively.
The chemistry is straightforward: a higher concentration of sugar creates a more substantial and stable glaze. Many home cooks, in an attempt to make their rice less sweet, reduce the sugar in their sushi-zu, inadvertently sabotaging the shine. According to sushi expert Marc Matsumoto, a lower sugar content has a direct and noticeable impact on the final gloss. The traditional formula is designed for both flavour and aesthetics. While ratios can vary slightly, the traditional golden ratio for sushi vinegar is often cited as 4:2:1 (rice vinegar to sugar to salt). This ensures there’s enough sugar to perform its crucial aesthetic function.
Think of it as applying a final coat of lacquer to a piece of wood. The wood itself might be perfectly prepared, but without the lacquer, its finish will be dull. Similarly, even perfectly cooked rice will lack that professional sheen if the sugar content is too low to form a proper glaze. Therefore, if your rice looks dull, the first diagnostic step is to critically evaluate the sugar ratio in your seasoning. Resisting the urge to cut back on sugar is often the simplest and most effective solution to restoring its gloss.
The Window of Gloss: Why Over-Fanning Makes Rice Look Matte?
The act of fanning sushi rice is a critical step, but it’s one of delicate balance. There exists a “window of gloss” where the technique creates shine; outside this window, the same action can destroy it. Fanning achieves two things simultaneously: it rapidly cools the rice through evaporative cooling and it wicks away excess surface moisture. This quick removal of steam and moisture is what helps set the sugar-vinegar glaze, preventing the rice from becoming sticky or mushy and allowing the crystalline coating to form.
However, the goal is not to dry the rice out. The objective is to cool it to approximately human skin temperature while it retains a perfect level of internal moisture. Over-fanning is a common mistake that leads to a matte, dull finish. When fanned for too long or too aggressively, the rice loses too much surface moisture. The glossy veneer either fails to form properly or it evaporates, leaving the starch on the grain’s surface to dry into a dull, chalky state. The rice may also become hard and lose its desired texture.
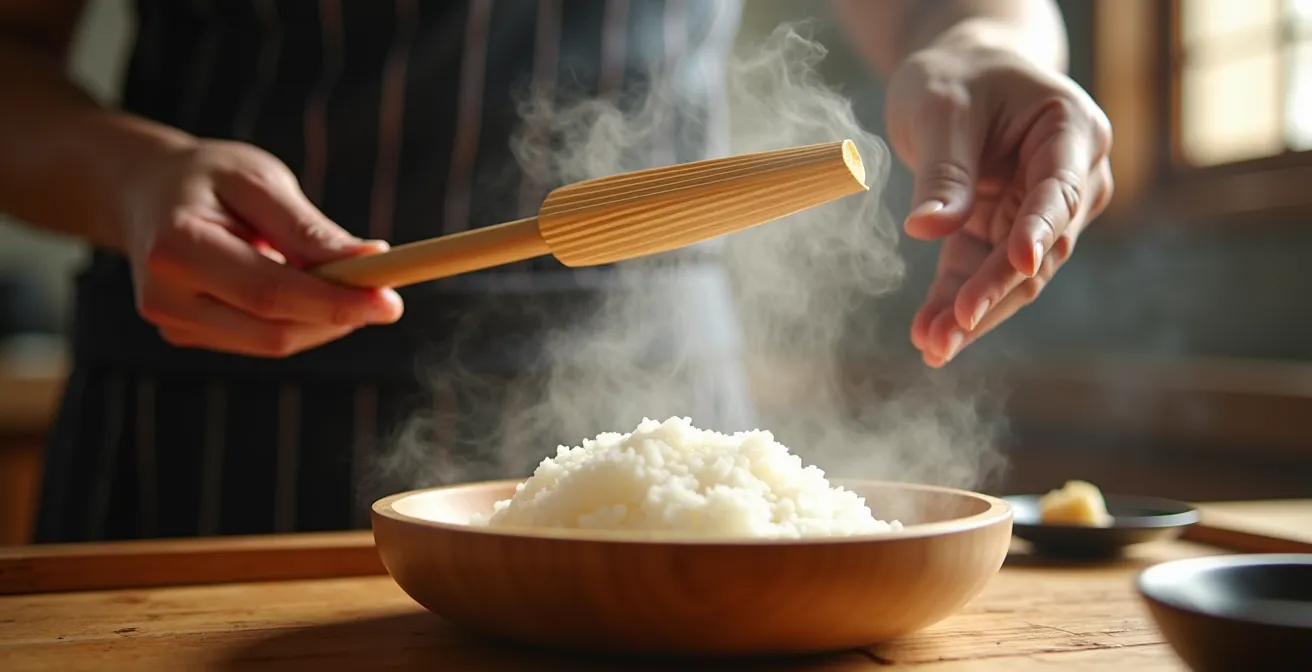
The key is to fan only until the rice no longer steams and feels just warm to the touch. The process should be brisk and efficient. Use one hand to fold and separate the grains with a rice paddle (shamoji) while the other hand creates a steady breeze with a fan (uchiwa). This ensures even cooling and seasoning. Once the rice has reached the target temperature and developed its initial sheen, the fanning must stop. Spreading the rice in a thin layer in a wide, shallow tub (hangiri) can also help achieve this result without excessive fanning.
Should You Add a Drop of Oil for Shine (and Is It Authentic)?
In the quest for glossy rice, some cooks are tempted to reach for a seemingly logical shortcut: adding a drop of oil. Oil creates shine on many foods, so the reasoning goes that it should work on rice as well. From an aesthetic and traditional standpoint, however, this is a significant misstep. Adding oil is not an authentic practice in traditional sushi preparation, and it ultimately interferes with the very qualities you seek to achieve.
The gloss on true sushi rice comes from a water-soluble sugar-vinegar glaze, not a lipid-based coating. Introducing oil can prevent the sushi-zu from properly adhering to and being absorbed by the rice grains. This can result in an uneven finish and a greasy mouthfeel that is antithetical to the clean taste of good sushi. Furthermore, the oil can negatively affect the “stickiness” of the rice, making it more difficult to shape for nigiri or rolls. The grains should cling together through the gelatinized starch, not because they are slicked with oil.
Sushi expert Marc Matsumoto offers a direct and clear warning against this practice. When asked about adding oil, particularly something like toasted sesame oil, he advises against it for several reasons:
As far as I’m aware of there is no law that says you can’t but I would not recommend it… The sugar in the mixture will burn. And I don’t think you’re going to end up with rice that has the shine and stickiness you are looking for.
– Marc Matsumoto, No Recipes – Perfect Sushi Rice
While traditional methods are paramount, some modern, non-traditional shortcuts do exist. One home cook shared a popular Japanese household hack for speeding up the cooling process: using an electric hairdryer on a cool or warm setting. This functions as a more powerful fan, rapidly wicking away moisture to set the glaze. While unconventional, this method respects the core principle of evaporative cooling without introducing a foreign substance like oil.
Koshihikari or Sasanishiki: Which Strain Retains Gloss Longer?
The choice of rice is the foundation upon which all other techniques are built. While any “sushi rice” is a short-grain Japonica variety, different strains possess unique chemical compositions that directly impact their aesthetic potential, particularly their ability to achieve and retain a glossy finish. The key difference lies in the ratio of two starch components: amylose and amylopectin. Amylopectin contributes to stickiness and a soft texture, while amylose helps grains remain more separate. This balance affects not only texture but also how the surface of the grain interacts with the sushi-zu glaze.
Generally, the high-quality Japonica rice used for sushi has a high amylopectin content, with the amylopectin content of Japonica rice being approximately 80%. This creates the prized sticky, slightly chewy texture. Koshihikari, one of the most popular and premium strains, is famous for its excellent flavour, texture, and its ability to produce a brilliant initial gloss. Its high amylopectin content results in a very sticky rice that holds its shape well, making it a favourite in high-end sushi restaurants.
Sasanishiki, another classic strain, presents a different profile. It has a slightly higher amylose content, making it less sticky. Its grains separate more cleanly, a quality some chefs prefer for nigiri. Aesthetically, Sasanishiki produces a more subtle, elegant sheen that is often described as more durable, retaining its luster longer than the initial brilliant gloss of Koshihikari. The choice between them is often a matter of chef preference, balancing initial visual impact against longevity and texture.
The following table, based on data from sushi experts, compares the qualities of these and another popular variety, Nanatsuboshi, which is prized for its excellent shine retention over time, making it suitable for bento boxes.
| Rice Variety | Gloss Quality | Starch Characteristics | Best Use |
|---|---|---|---|
| Koshihikari | Brilliant initial gloss | Higher amylopectin (80%), very sticky | Premium sushi restaurants |
| Sasanishiki | Subtle but longer-lasting | Higher amylose, less sticky | Nigiri (grains separate cleanly) |
| Nanatsuboshi | Excellent shine retention | Low amylose, retains stickiness over time | Bento boxes, daily use |
How Long Can Rice Sit in the Ohitsu Before Losing Its Luster?
Once you’ve achieved the perfect gloss, the next challenge is preserving it. Sushi rice is a delicate creation, and its beautiful sheen has a limited lifespan. The key to extending this life lies in proper storage, which traditionally involves a wooden tub known as an ohitsu. Unlike a plastic or metal bowl, an unlacquered wooden container plays an active role in maintaining the rice’s “skin health” by regulating moisture.
The wood, often cypress or sawara, is hygroscopic; it absorbs excess moisture when the rice is too damp and releases it back when the rice begins to dry out. This creates a stable micro-environment that preserves both the texture and the gloss. Before use, the tub should be moistened so that, as one expert notes, it will not soak up the vinegar from the rice and will help prevent sticking. After the seasoned rice is placed inside, it must be covered immediately with a damp cloth to prevent the surface from drying out.
Under these ideal conditions at room temperature, the sushi rice will maintain its peak gloss and texture for the first two hours. It can generally be held for a few hours without significant degradation. However, the clock is always ticking. As time passes, the moisture balance will eventually shift, and the crystalline sugar glaze will begin to break down, causing the shine to fade. One critical rule is to never refrigerate sushi rice for short-term storage. The cold temperature causes starch retrogradation, making the grains hard, dry, and irrevocably dull. The refrigerator is the fastest way to destroy the texture and appearance you worked so hard to create.
Why Must You Fan the Rice While Mixing the Vinegar?
The simultaneous act of mixing vinegar and fanning the rice is the most dynamic and critical moment in creating shari. It is here that the transformation from plain cooked rice to glossy sushi rice occurs. This dual action performs a kind of controlled thermal shock that is essential for both texture and appearance. The primary goal is to cool the rice quickly from steaming hot down to body temperature while the vinegar is being incorporated.
As the experts at Sudachi Recipes explain, this process serves two main purposes. First, the rapid cooling and removal of surface steam prevent the gelatinized starch on the outside of the grains from becoming gummy, ensuring they remain distinct rather than clumping into a sticky mass. Second, the heat is necessary for the vinegar to be properly absorbed.
Why do this? First, to keep it from sticking together… Second, to keep the vinegar flavor… Without heat, the vinegar won’t soak into the rice well, leaving it dull, and not shiny.
– Sudachi Recipes, How to Make Perfect Sushi Rice
If you were to pour vinegar onto cool rice, it would merely sit on the surface, resulting in a sour taste and a dull finish. The heat of the freshly cooked rice opens up the starch structure, allowing the seasoning to penetrate the grain. The fanning then rapidly evaporates the excess water from the vinegar and the steam from the rice, which concentrates the sugar on the surface and “sets” the glaze, locking in the shine. This process must continue until the rice is cooled to the temperature of human skin, feeling just warm. Performing these actions separately—mixing first, then cooling later—would fail to create the desired effect.
How to Use a Wooden Ohitsu to Regulate Rice Humidity and Heat?
The wooden tub used for making and storing sushi rice, known as a hangiri or sushi oke during mixing and an ohitsu for storage, is not merely a traditional vessel; it is a functional tool for aesthetic preservation. Its primary role is to manage heat and humidity, creating the ideal environment for the rice to maintain its perfect texture and gloss. Made from unfinished wood like cypress, the material has natural hygroscopic properties, meaning it actively exchanges moisture with its contents.
Proper preparation of the tub is the first step. Before adding the hot rice, the wood must be conditioned. This prevents the dry wood from aggressively absorbing the vinegar from the rice and stops the grains from sticking stubbornly to the surface. By letting it soak in water or brushing it with vinegar or water, you pre-saturate the wood, ensuring it performs its regulatory function correctly. Once the rice is mixed and seasoned within the hangiri, it can be transferred to an ohitsu or kept in the same tub for serving.
The broad, shallow shape of the hangiri is also by design. It maximizes the surface area of the rice, which facilitates the rapid, even cooling required during the fanning stage. Once cooled, covering the tub with a damp cloth works in concert with the wood. The wood absorbs any excess condensation, preventing the rice from becoming soggy, while the damp cloth prevents the surface from drying out. This delicate hygroscopic balance is something that non-porous materials like plastic, glass, or metal cannot replicate. They trap moisture, leading to gummy rice and a deteriorating glaze. Using a wooden tub is a commitment to preserving the rice’s integrity.
Action Plan: Preparing Your Ohitsu for Peak Performance
- Moisten the Vessel: Before use, fill the wooden tub with water and let it soak for a few minutes, or brush the entire inner surface with water or vinegar. This prevents the dry wood from absorbing the seasoning.
- Dry and Prepare: Pour out the water and wipe the inside dry with a clean towel. The wood should be damp, not wet. Place your rice paddle (shamoji) in a cup of water to prevent sticking.
- Mix with Care: Add the hot cooked rice and spread it out. Pour the sushi-zu over the paddle to distribute it evenly. Use a slicing and folding motion to mix, ensuring you don’t crush the grains.
- Cool and Cover: Fan the rice while mixing until it reaches body temperature and becomes glossy. Once ready, immediately cover the tub with a clean, damp kitchen towel.
- Serve in Time: Keep the rice at room temperature and aim to use it within a couple of hours to enjoy its optimal texture and shine. Never refrigerate.
Key Takeaways
- The gloss on sushi rice is a sugar-vinegar glaze that requires precise temperature and moisture control to form correctly.
- Fanning is essential for rapid cooling to set the glaze, but over-fanning dries out the rice and makes it matte.
- The choice of rice strain (e.g., Koshihikari vs. Sasanishiki) affects gloss and texture due to different starch compositions.
How to Shape Hand-Pressed Sushi Rice Without Crushing the Grains?
The final step in presenting your beautifully glossy rice is shaping it, typically for nigiri. All the work you’ve done to achieve the perfect texture and sheen can be undone in seconds by improper handling. The goal is to create a small bed of rice that is cohesive enough to hold its shape but airy enough that the grains remain distinct. Preserving grain integrity is the aesthetic and textural priority at this stage.
Crushing the rice is the cardinal sin of shaping. When you apply too much pressure, the individual grains mash together, destroying their structure and releasing excess starch. This not only creates a dense, pasty texture but also ruins the visual appeal. The light can no longer reflect off the individual glazed surfaces, and the rice mound appears dull and compacted. The art of nigiri lies in achieving what is known as “form without pressure.” The ideal nigiri rice is shaped with a light touch, using a few quick, practiced movements to gently coax the grains together.
In Japan, achieving this level of skill is a life’s work. It can take an aspiring chef five years of training before they are even allowed to begin making the rice, and years more to perfect its handling. As one account of professional training highlights, the journey to becoming an itamae (sushi chef) can take up to 20 years, with a significant portion dedicated solely to mastering rice. This underscores the immense importance placed on preserving the texture and integrity of each grain. For nigiri, a surprisingly small amount of rice is used—experts suggest one nigiri sushi requires 20 g of sushi rice. This small portion should be handled with wet hands (using tezu, a hand-dipping water mixed with vinegar) to prevent sticking, allowing you to shape the rice with minimal pressure.
Achieving that elusive, professional-grade gloss on your sushi rice is a journey of understanding, not just of following steps. It requires you to become a true food aesthetician, one who appreciates the delicate chemistry of starches and sugars and the physics of heat and humidity. By diagnosing issues with your sugar ratio, perfecting your fanning technique, and respecting the integrity of each grain from the tub to the final press, you can consistently produce shari that is not only delicious but also visually stunning.