The biggest mistake in making nigiri is trying to form a compact rice ball; the true goal is to engineer a delicate structure with a loose, airy core.
- Pressure is not uniform. It’s a gradient applied with your fingertips to create a firm outer shell while preserving internal space.
- Moisture is not about wetness. It’s a micro-thin film of tezu that enables grip without water-logging the rice.
Recommendation: Focus on the feel of holding a small bird—firm enough to control, gentle enough not to harm. This is the correct pressure.
For the intermediate sushi maker, the greatest frustration is not a lack of knowledge but a failure of execution. You know the ingredients, you have the recipe, yet your nigiri either collapses into a loose pile or becomes a dense, heavy rice cake. You’ve been told to “wet your hands” and “press firmly,” but these instructions are the very source of the problem. They treat a delicate craft like brick-making, leading to a disappointing texture and mouthfeel.
The common advice misses the fundamental point. Shaping nigiri is not about compression; it is about structural engineering on a miniature scale. The goal is to create a specific architecture within the rice: a form where the outer grains are cohesive and create a stable shell, while the inner grains remain distinct and separated by tiny pockets of air. This internal structure is what produces the coveted hodoke—the way the rice pleasantly disintegrates in the mouth.
This guide abandons vague platitudes for a technical, ergonomic approach. We will deconstruct the mechanics of pressure, the physics of moisture control, and the precise movements required to achieve structural integrity without crushing a single grain. Forget what you think you know about “forming a rice ball.” You are about to learn how to build one.
This article will provide a systematic breakdown of the essential techniques. We will analyze everything from the foundational importance of an air pocket to the specific pressure adjustments required for different toppings, giving you the tools to move from inconsistent results to deliberate mastery.
Table of Contents: The Art of the Perfect Nigiri Form
- Why Creating an Air Pocket Inside the Rice Ball Improves Mouthfeel?
- How to Master the Kotegaeshi Flip Technique in 10 Minutes a Day?
- Tezu Water: How Much Moisture Do Your Hands Need to Prevent Sticking?
- The Compression Mistake That Turns Your Nigiri Into a Hard Rice Cake
- Should You Press Harder When Topping Rice With Squid vs. Tuna?
- The Rice-Mixing Mistake That Ruins Texture for 80% of Beginners
- How to Break Apart Rice Clumps Using the Edge of the Paddle?
- How to Roll Tight Maki Rolls That Don’t Fall Apart When Sliced?
Why Creating an Air Pocket Inside the Rice Ball Improves Mouthfeel?
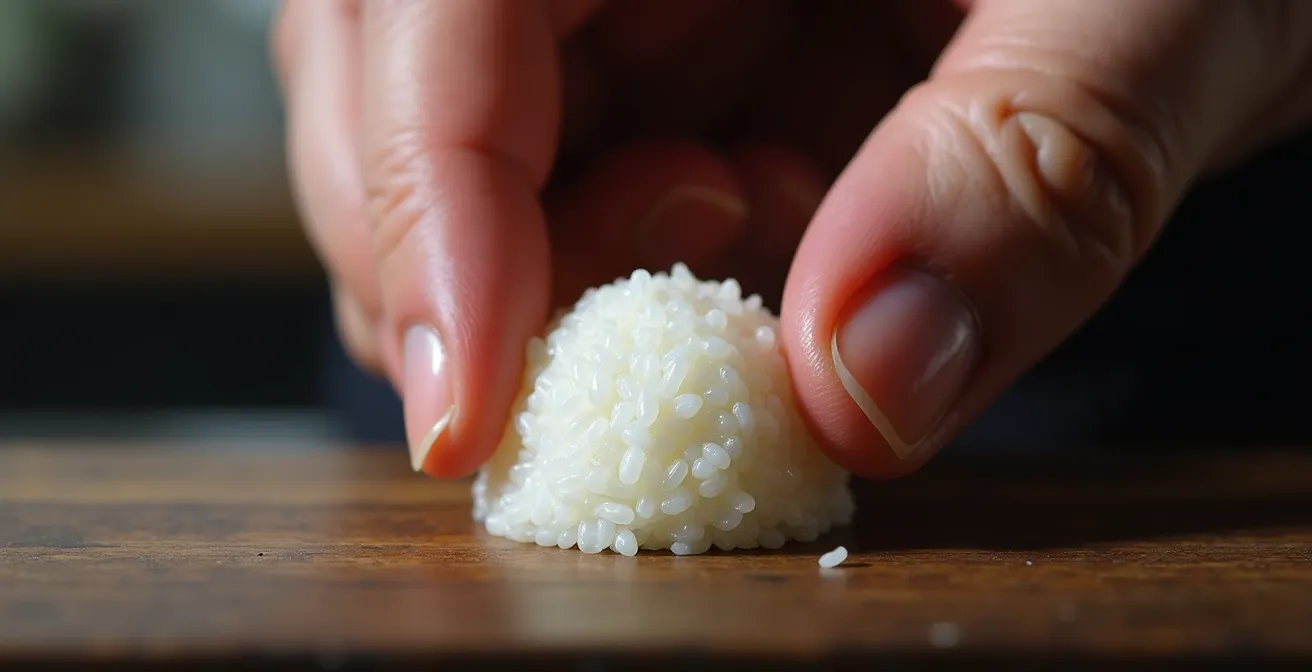
The defining characteristic of expertly made nigiri is not its shape, but its texture upon consumption. The ideal is a phenomenon known as hodoke, the pleasant sensation of the rice clump disintegrating in the mouth without resistance. This is physically impossible to achieve with a dense, compacted ball of rice. The secret lies in creating a central air pocket, a void that allows the structure to collapse gracefully under the slightest pressure from the tongue.
This air pocket is the result of a deliberate pressure gradient. Your hands must apply just enough force to the exterior to make the grains interlock and form a cohesive shell, while the interior remains loose and uncompressed. Think of it as an archway in architecture: the outer stones are under compression and hold the shape, but the space underneath is what gives the arch its function. Without that internal space, you have a solid wall—or in this case, a gummy rice cake.
As the illustration demonstrates, properly formed nigiri has visible space between the grains at its core. When you apply gentle pressure with your thumb to the center of the rice clump during formation, you are not just making a dimple; you are initiating this crucial internal void. The subsequent shaping and rolling steps must be designed to protect this pocket, not eliminate it. This careful balance between a firm exterior and an airy interior is the primary objective of nigiri shaping.
Ultimately, the air pocket is a functional feature, not an aesthetic one. It transforms the eating experience from chewing a solid mass to enjoying a light, delicate structure that melts away, allowing the flavor of the rice and topping to be fully appreciated.
How to Master the Kotegaeshi Flip Technique in 10 Minutes a Day?
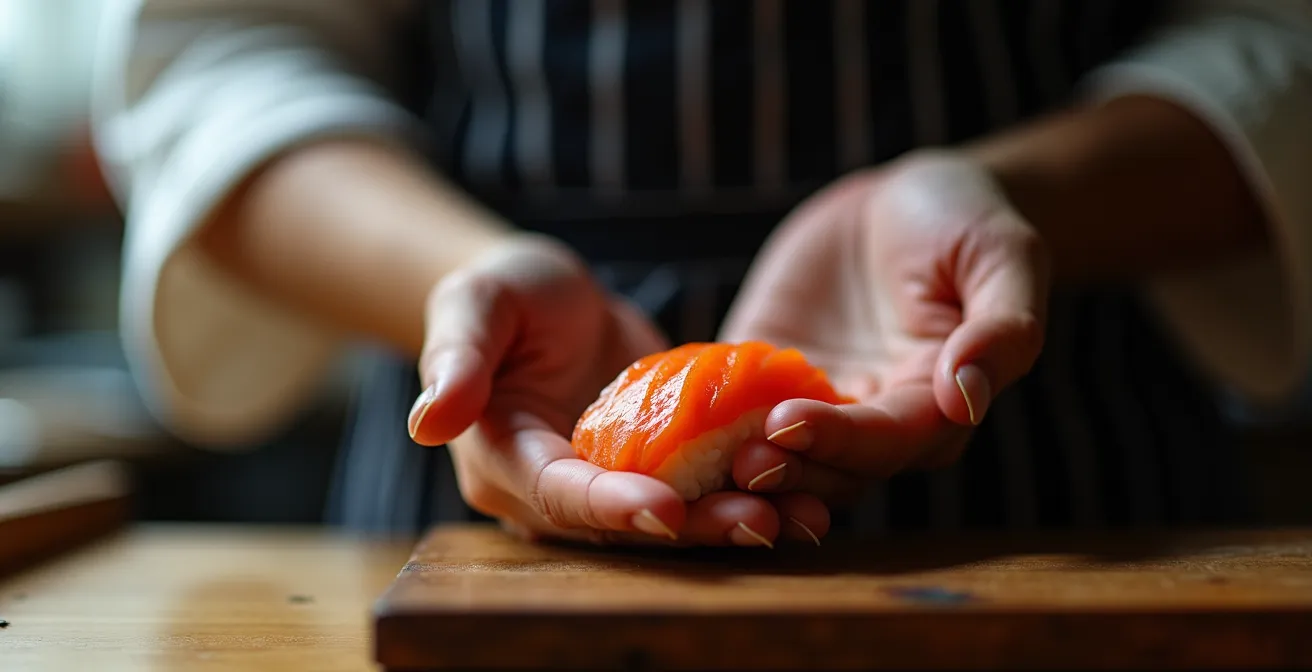
The kotegaeshi, or small hand turn, is not mere showmanship. It is the most ergonomically efficient method for creating the necessary pressure gradient in nigiri. Mastering this movement is the key to producing consistent results. The technique is part of a sequence that can include true turns (honte-gaeshi) and standing turns (tate-gaeshi), all designed for one purpose: to form a clump of rice where the inside is loose while the outside is tightly packed.
To practice, start with the correct amount of rice. A professional standard is critical for consistency; a study by sushi masters shows that each nigiri piece should contain 8.5 to 10 grams of rice. Take this amount in your left hand. Place the fish (neta) across the base of the fingers of your right hand. Place the rice on top of the fish. Now, the flip: use the momentum of your fingers to roll the rice and fish, using your left thumb to gently guide and shape the sides. It is a single, fluid motion, not a series of distinct steps.
The common question is, “How do I know if I’m applying the right pressure?” The most effective analogy from professional chefs is to imagine you are holding a hamster or a baby bird. You must hold it firmly enough that it cannot escape, but gently enough that you do not crush it. This is the precise level of pressure required. It is a feeling, a tactile feedback loop that you must develop through repetition. Dedicate ten minutes each day to practicing this flip, focusing on the sensation in your hands. At first, use just rice until the motion becomes second nature.
Over time, you will learn to feel the outer grains of rice locking together while the core remains pliable. This tactile skill, more than any other, is what separates an intermediate from an expert.
Tezu Water: How Much Moisture Do Your Hands Need to Prevent Sticking?
Rice will stick to your hands. This is a fact of physics. The mistake is to combat this with excessive water, which waterlogs the rice and destroys its structural integrity. The correct tool is tezu—a hand-dipping liquid made of water mixed with a small amount of rice vinegar. The vinegar’s acidity reduces the water’s surface tension, allowing you to create an impossibly thin barrier on your skin.
The goal is not to have wet hands, but to have a microscopic, non-stick moisture film. As the experts at The Japanese Food Lab state, achieving this requires precise application:
Dipping more than your fingertips into the tezu will collect too much water into your hands, making it hard to form nigiri.
– The Japanese Food Lab, Professional Nigiri Making Guide
This single piece of advice is paramount. You should only ever dip your fingertips, and never past the first knuckle. The moisture is then transferred by wiping your fingertips from one hand to the other, followed by a single soft clap to distribute the film evenly across your palms. You do not re-apply on a schedule, but only when you feel your hands becoming tacky again. This teaches you to be sensitive to the tactile feedback of the process.
Action Plan: Mastering Tezu Water Application
- Prepare Tezu: Mix water with a small amount of rice vinegar to reduce surface tension.
- Dip Fingertips Only: Submerge only your fingertips, never going past the first finger joint.
- Transfer Moisture: Wipe the fingertips of one hand across the palm of the other to transfer the liquid.
- Distribute Evenly: Perform a single, soft clap to create a uniform, micro-thin film across both palms.
- Re-apply on Feel: Only re-dip when your hands begin to feel tacky, not on a fixed schedule.
Treating tezu with this level of discipline is fundamental. It is the enabling factor that allows all other shaping techniques to be performed correctly, preventing sticking without compromising the rice’s delicate texture.
The Compression Mistake That Turns Your Nigiri Into a Hard Rice Cake
The most common and destructive error in nigiri making is applying uniform, excessive pressure. This brute-force approach crushes the rice grains, releases excess starch, and creates a dense, gummy puck. The correct technique involves a gentle and targeted pressure that respects the grain individuality. Japanese sushi masters describe the appropriate pressure as being akin to holding a baby chicken—firm enough to control its movement, but gentle enough not to cause it harm.
Applying too much pressure packs the rice too tightly, making it heavy and destroying the potential for hodoke. The goal is to create a structure where only the outermost layer of grains is compressed enough to hold the shape. The inside must remain loose. This is a concept that cannot be rushed. You must slow down and focus on the feedback your hands are receiving from the rice.
The temperature of the rice also dramatically affects how it responds to pressure. Attempting to shape rice that is too cold or too hot will lead to failure, regardless of your technique. Ideal rice should be at about human body temperature, where it is pliable and easy to shape. The following table outlines the challenges presented by improper rice temperature.
As a comparative analysis demonstrates, temperature is a critical variable in shaping.
| Rice Temperature | Handling Difficulty | Result |
|---|---|---|
| Too Cold | Sticky and hard to handle | Won’t form properly |
| Body Temperature (Ideal) | Easy to shape | Perfect texture and cohesion |
| Too Warm | Sticks to hands | Becomes mushy |
| Recently Vinegared | Very sticky | Difficult to shape until absorbed |
By combining gentle pressure with temperature-correct rice, you create the conditions for success. You allow the rice grains to link up without being crushed, preserving the delicate texture that is the hallmark of high-quality nigiri.
Should You Press Harder When Topping Rice With Squid vs. Tuna?
Yes. The idea of a single, universal pressure for all nigiri is a fallacy. A skilled chef adapts the pressure based on the texture, weight, and surface properties of the neta (topping). This is an advanced level of control that separates good from great. A fatty piece of tuna (otoro) is delicate and will adhere to the rice with minimal pressure. In contrast, a piece of squid (ika) or octopus (tako) is firmer and more slippery, requiring a quicker, more decisive press to ensure proper adhesion.
This pressure must be applied with specific parts of your hand. Your thumb provides a firm wall on the side, while two fingers apply moderate pressure from the top, and your palm cups the entire form gently. It is a three-zone pressure model that you must learn to modulate instinctively. The temperature of the fish is also a factor; to ensure food safety and optimal texture, most sushi masters maintain fish at room temperature (20-22°C) during service.
The following are general guidelines for topping-specific pressure. Practice with different types of toppings to develop a feel for these nuances:
- Fatty Tuna (Otoro): Minimal pressure. This is about gentle placement, not pressing.
- Sea Urchin (Uni): The lightest possible touch to preserve its extremely delicate texture.
- Squid (Ika): A quick, firm press is needed for a secure bond.
- Octopus (Tako): Moderate to firm pressure is required due to its slippery, resilient surface.
- Cooked Shrimp (Ebi): Light to moderate pressure is sufficient.
- Salmon (Sake): Standard, moderate pressure provides the right balance.
Ultimately, this is a dialogue between your hands and the ingredients. Each piece of fish will tell you how much pressure it needs. Your job is to learn how to listen.
The Rice-Mixing Mistake That Ruins Texture for 80% of Beginners
The structural integrity of your nigiri is decided long before you ever try to shape it. It begins with how you mix the cooked rice with the vinegar seasoning. The most common mistake, made by the vast majority of beginners, is to stir the rice. Stirring, especially in a circular motion, causes the soft, sticky grains to mash against each other, crushing them and creating a paste-like consistency. This destroys grain individuality from the start.
The correct method is a “cutting and folding” motion. The goal is to cook the rice al dente—firm, but not crunchy—and then to incorporate the vinegar while preserving the integrity of each individual grain. To do this, you must hold your rice paddle (shamoji) at a 45-degree angle to the surface of the rice in the mixing tub (hangiri).
From this angle, you use the edge of the paddle to slice through the rice, breaking up any large clumps. Then, you gently fold sections of rice over themselves. This combination of cutting and folding distributes the vinegar evenly without applying downward, crushing pressure. You must perform these actions quickly while the rice is still hot, as this is when it is most pliable and absorbent. The entire process should be paired with fanning the rice, which helps to cool it rapidly, evaporate excess moisture, and give the grains a characteristic shine.
- Hold the rice paddle at a 45-degree angle.
- Use a sharp, slicing motion to break up clumps.
- Fold the rice over itself; never stir in circles.
- Work quickly while the rice is hot.
- Fan the rice continuously during mixing.
- Avoid all downward pressure that could crush the grains.
By mastering this technique, you ensure that the rice arriving at the shaping stage has the perfect texture and structural potential. You are setting yourself up for success before the main event even begins.
How to Break Apart Rice Clumps Using the Edge of the Paddle?
Even with perfect steaming, hot rice straight from the cooker will have clumps. Your first instinct might be to mash them with the flat of your paddle, but this is a critical error that leads to mushy rice. The correct approach requires a surgical touch, using the thin edge of the shamoji as a blade. A specific technique, the “cross-hatch,” is extremely effective for separating grains without damage.
After transferring the hot rice to the hangiri, wait a moment for the initial, dense plume of steam to escape. Then, holding the paddle perpendicular to the rice bed, make a series of gentle, parallel cuts across the entire surface. Turn the bowl 90 degrees and repeat the process, creating a cross-hatch pattern. This action physically separates the clumps without compressing them, creating channels for the vinegar to penetrate deeply and evenly.
Once the vinegar is poured over the cross-hatched rice, you begin the folding motion. Do not stir. Lift sections of the rice from the bottom and fold them over the top. As you do this, you must simultaneously fan the rice. As noted in the Chopstick Chronicles guide to perfect sushi rice, this is a crucial step:
Use a fan to cool the rice as you ‘cut’ the vinegar into it, so the rice is shiny.
– Chopstick Chronicles, Perfect Sushi Rice Guide
The fanning action serves two purposes: it cools the rice to stop the cooking process and prevent it from becoming mushy, and it helps to evaporate the excess moisture from the vinegar, leaving behind only the flavor and a glossy sheen on each grain.
This disciplined, non-destructive method for breaking up clumps is fundamental. It ensures that every grain remains a distinct entity, ready to be shaped into a light, airy structure.
Key Takeaways
- The goal of nigiri is a loose core and a firm exterior for optimal hodoke (mouthfeel).
- Pressure control is not about force but about a gentle, graduated application, like holding a small animal.
- Proper rice mixing (cutting, not stirring) and moisture management (tezu) are non-negotiable prerequisites.
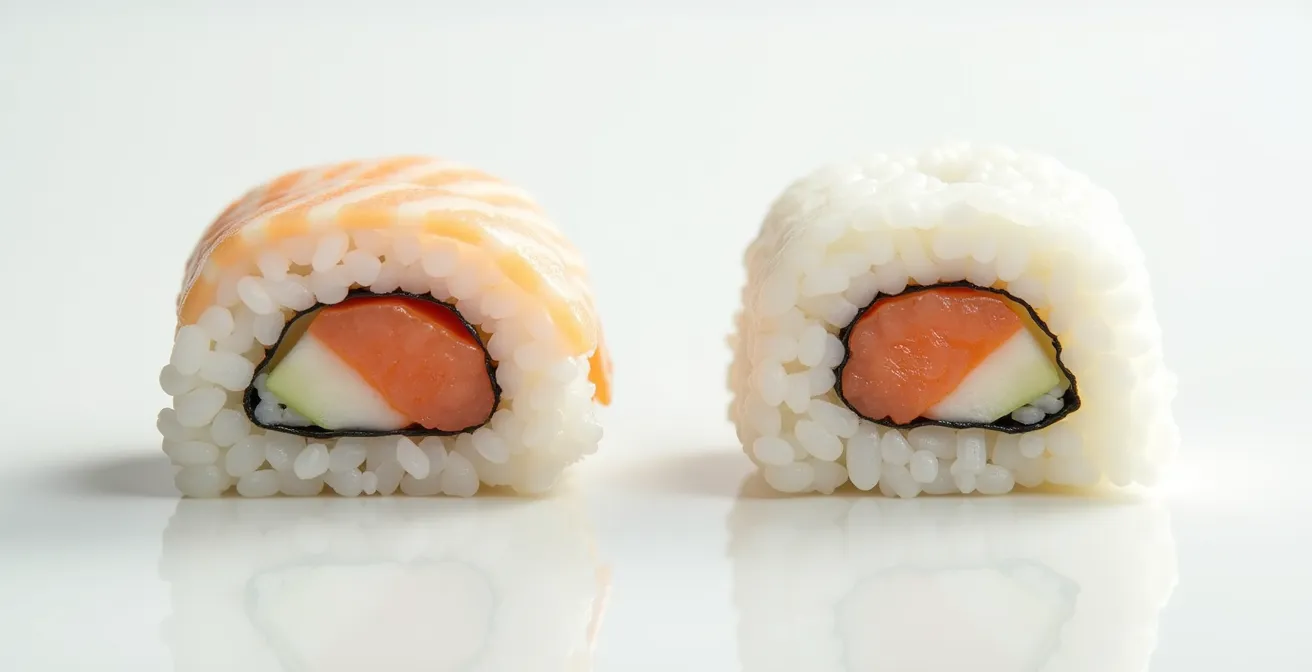
How to Roll Tight Maki Rolls That Don’t Fall Apart When Sliced?
While this guide focuses on nigiri, the core principles of pressure control and structural integrity are universal in sushi making. In maki rolls, the bamboo mat (makisu) becomes the tool for applying this pressure, but the objective remains the same: create a compact form that holds together without crushing its components. A roll that falls apart upon slicing is the direct result of a loose core, caused by insufficient and uneven pressure during rolling.
The key technique is the “tuck and pull” method. After arranging your rice and fillings on the nori, you begin the roll by using your fingertips to tuck the edge of the nori tightly under the fillings. This creates a firm, stable core. Once this initial tuck is secure, you use the mat to continue the roll. With one hand holding the top of the mat steady, the other hand pulls the mat towards you as you roll. This pulling action is what tightens the roll uniformly, compressing it just enough to eliminate gaps without mashing the ingredients.
The pressure must be modulated throughout the process. The initial tuck is firm, the middle rolling is a moderate and consistent pull, and the final sealing of the edge is done with a light press. The final shaping is done through the mat to ensure a uniform cylinder or square shape. This table outlines the pressure at each stage.
A breakdown of professional techniques confirms this graduated pressure approach.
| Roll Component | Pressure Level | Technique |
|---|---|---|
| Initial Tuck | Firm | Tuck nori edge under filling with fingertips |
| Middle Rolling | Moderate | Pull mat towards you while rolling |
| Edge Sealing | Light | Gentle press to seal with water |
| Final Shaping | Uniform | Press sides and top through mat |
Begin applying these principles of pressure and structure today. Dedicate ten minutes daily to the kotegaeshi flip to build the necessary muscle memory and transform your technique.
Frequently Asked Questions About Shaping Nigiri
Why does my nigiri fall apart when picked up?
The rice is either too loosely packed or you’re using too much water on your hands. Use only fingertip moisture and apply gentle pressure to create outer cohesion while keeping the center light.
How do I know if I’m applying the right pressure?
Professional chefs describe it as holding a hamster – firm enough that it won’t escape, but gentle enough not to squish it.
What’s the correct hand positioning for the flip?
Place fish at the base of your fingers, add rice on top, then use finger momentum to roll while your left thumb assists if needed.