Contrary to popular belief, you don’t need access to a high-end Japanese fish market to create spectacular nigiri at home.
- The texture and flavor of standard supermarket salmon can be dramatically improved with a simple, 10-minute salt cure.
- The secret to the perfect bite lies in sensory contrast: serving chilled fish over body-temperature rice, a detail most home cooks miss.
Recommendation: Focus your budget on high-quality rice vinegar and nori instead of splurging on the fish itself; these elements have a greater impact on the final taste.
The dream of recreating that perfect, melt-in-your-mouth nigiri from your favorite sushi bar often seems to shatter against the reality of a local supermarket’s seafood counter. We’re led to believe that the pinnacle of sushi, a slice of raw fish over seasoned rice, is an art form reserved for chefs with access to prohibitively expensive, “sushi-grade” ingredients. This often leads budget-conscious cooks down a rabbit hole of searching for special labels or giving up entirely, settling for California rolls.
While the quality of the fish is undeniably important, the pervasive myth is that you must *start* with a perfect, top-tier product. This overlooks the arsenal of techniques that professional chefs use to elevate good ingredients into great ones. This isn’t about just slicing a piece of salmon and placing it on a mound of rice; it’s about transformation. It’s about understanding how to manipulate texture, enhance flavor, and master sensory contrasts using exactly what’s available to you.
But what if the true secret wasn’t in the fish you buy, but in what you *do* to it? What if a few clever, counter-intuitive steps could turn a standard fillet of supermarket salmon into something with the firm texture and concentrated flavor of its restaurant-grade counterpart? This is the resourceful chef’s approach: focusing on technique and strategic investment to achieve excellence without the exorbitant cost.
This guide will walk you through the essential, technique-driven secrets to do just that. We’ll deconstruct the process, moving from fish preparation and slicing to the critical, often-overlooked details of ratio and temperature, empowering you to create nigiri that truly rivals the professionals, using ingredients from your local store.
This article provides a complete roadmap for mastering homemade nigiri. Below is a summary of the key techniques and strategic insights we will cover to elevate your skills from amateur to artisan.
Summary: How to Achieve Nigiri Excellence With Supermarket Fish Cuts?
- How a 10-Minute Salt Cure Can Transform Supermarket Salmon?
- How to Slice a Rectangular Saku Block Into Perfect Nigiri Rectangles?
- Fish-to-Rice Ratio: How Big Should the Rice Ball Be for a Standard Slice?
- The Temperature Mistake That Makes Supermarket Fish Taste Fishy
- What Simple Glaze Can Make Dull Fish Look Like Restaurant Quality?
- Why Spending $10 More on Nori Changes the Dish More Than Expensive Rice?
- The Pricing Error That Makes People Think Sushi Can’t Be Cheap and Good
- How to Identify True Sashimi-Grade Fish at Your Local Market?
How a 10-Minute Salt Cure Can Transform Supermarket Salmon?
The single most impactful technique for elevating supermarket fish is a quick salt cure. Supermarket salmon, particularly if it’s been previously frozen, can have a slightly soft texture and higher water content. This process, known as a “shiome” cure in Japanese cuisine, uses the principle of osmosis to draw out excess moisture. The result is a fillet that is noticeably firmer, with a more concentrated flavor and a beautiful, almost translucent sheen. It’s a 10-minute step that bridges the gap between a standard fillet and one that feels purpose-made for nigiri.
This isn’t about heavily salting the fish for preservation; it’s a rapid flavor and texture adjustment. The brief exposure to salt and sugar (if used) tightens the proteins in the fish’s flesh. After rinsing and drying, the fish becomes less prone to falling apart and has a much cleaner, less “fishy” taste. It’s the first and most crucial act of ingredient transformation.
To perform this simple but effective cure, follow these steps precisely:
- Sprinkle salt and sugar evenly over all surfaces of the salmon fillet. A common ratio is equal parts salt and sugar.
- Let the fillet cure for exactly 10 minutes. You will see moisture bead up on the surface as the cure does its work.
- Rinse the fillet thoroughly with cold water to remove all traces of the cure, then pat it completely dry with paper towels. The fish is now ready for slicing.
While a simple salt cure is highly effective for fatty fish like salmon, other methods can be used for different types of fish, each yielding a unique result. The choice of method depends on the desired texture and the type of fish being prepared.
How to Slice a Rectangular Saku Block Into Perfect Nigiri Rectangles?
You do not need an expensive, single-bevel Japanese *yanagiba* to achieve clean, professional-looking slices. The secret lies in resourceful precision: using your sharpest standard chef’s knife with the correct technique. The goal is a long, angled cut called *sogigiri*, which maximizes the surface area of the slice, making it appear larger and improving its texture. Before you begin, ensure your knife is freshly honed; a sharp edge is non-negotiable as it slices through the flesh cleanly rather than tearing it.
Position the rectangular fish block, or *saku*, with the shorter end facing you. The technique involves a single, fluid pulling motion. Avoid a back-and-forth sawing motion, which damages the delicate flesh. Let the weight of the knife and the length of the blade do the work. According to Chef Nobu, the ideal fish slice measures 3 inches by 1 inch by 0.25 inches, a perfect guideline for your cuts. Don’t worry about leftover bits; these imperfect pieces are perfect for making spicy tuna or salmon mixes for rolls, embracing a zero-waste value approach.
To master the cut, visualize the process. The image below shows the critical angle of the blade against the fish block.
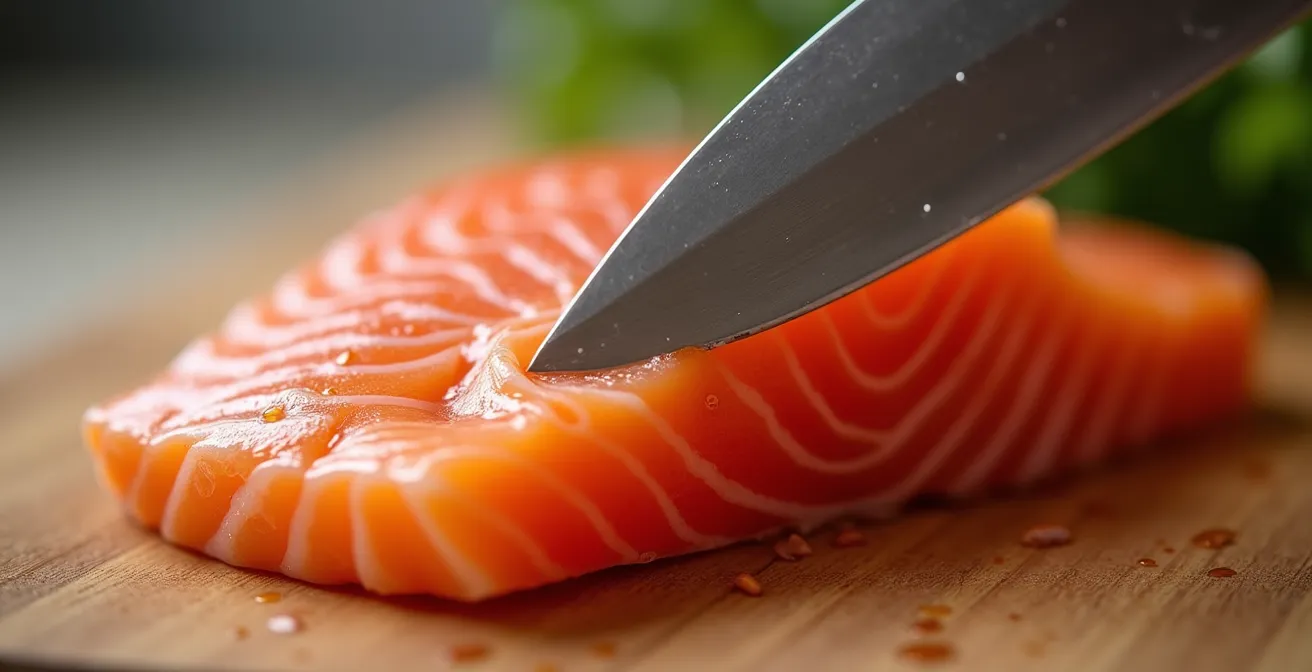
As you can see, the knife is not held vertically. By angling the blade at approximately 45 degrees, you create a slice that drapes elegantly over the rice. Here is how to execute it perfectly:
- Angle your sharpened chef’s knife at a 45-degree angle relative to the cutting board.
- Start the cut at the heel of the blade and pull the knife smoothly towards you, using the full length of the blade to finish the slice at the tip.
- Aim for slices that are about 1/4 inch thick. You can adjust the angle to be more vertical for the thicker part of the fillet and more angled for the thinner tail end to maintain consistent size.
Fish-to-Rice Ratio: How Big Should the Rice Ball Be for a Standard Slice?
In the world of nigiri, balance is everything. An oversized ball of rice will overpower the delicate flavor of the fish, while too little will fail to provide the satisfying textural contrast that defines great sushi. Achieving the correct fish-to-rice ratio is a subtle art that separates amateur efforts from professional results. It’s not just about size, but about creating a single, harmonious bite where both components can shine.
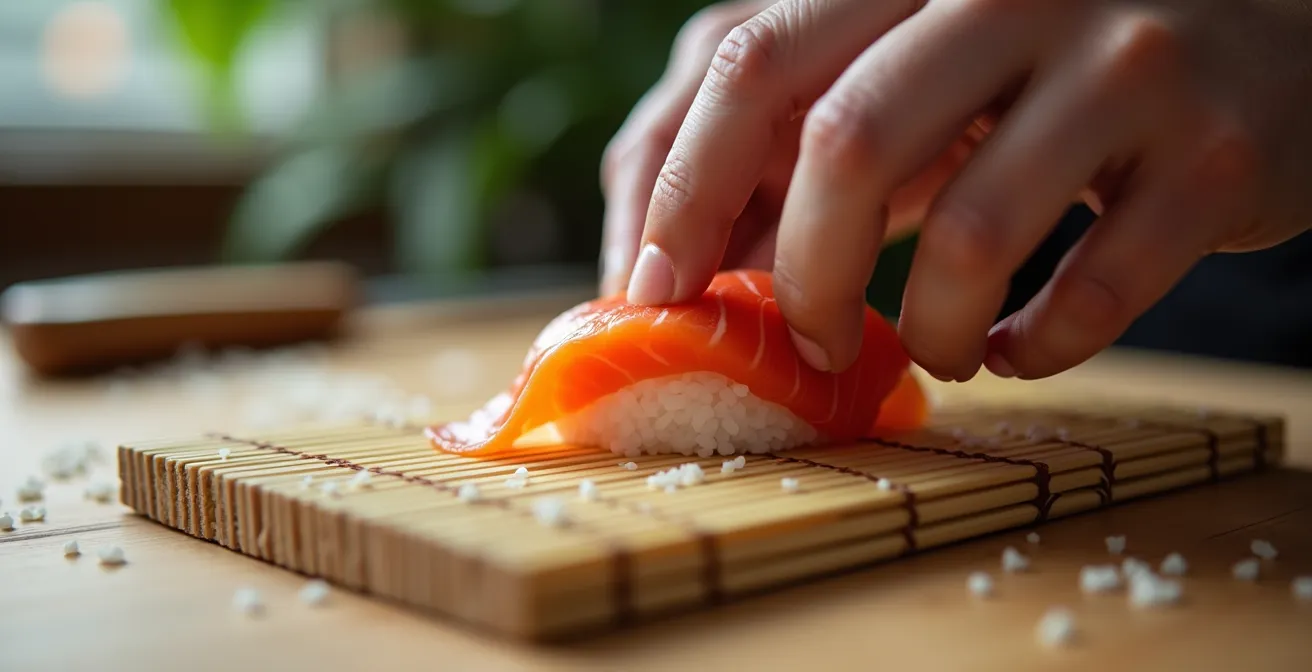
While it may vary slightly by chef and region, traditional nigiri contains approximately 8.5-10g of rice per piece. This is surprisingly small—about the size of a large quail’s egg. However, this is a starting point, not a rigid rule. The true art lies in adjusting the rice portion based on the topping. Fattier, richer fish like salmon or tuna belly (*toro*) can handle a slightly larger rice portion (around 18-20g) to balance their intensity. Conversely, leaner and more delicate white fish like snapper or halibut benefit from less rice (12-15g), allowing their subtle flavors to come forward.
The visual cue is just as important as the weight. The slice of fish should drape elegantly over the rice, with about 1cm of overhang on the front and back. This presentation is not just for aesthetics; it ensures the fish is the first thing your tongue touches. When forming the rice, press gently. The goal is a ball that holds its shape but remains airy, not a dense, compacted brick. The grains should be distinct, providing a tender foundation for the fish.
Here is a quick visual guide to perfecting your portions:
- Shape the seasoned rice into an oblong ball roughly the size of a large quail egg.
- For fatty fish (salmon, tuna belly), aim for a slightly larger portion, around 18-20g.
- For lean fish (snapper, flounder), reduce the rice to 12-15g to avoid overpowering it.
- Always ensure the fish slice comfortably covers the rice with a slight overhang.
The Temperature Mistake That Makes Supermarket Fish Taste Fishy
Perhaps the most overlooked and counter-intuitive secret to restaurant-quality nigiri is mastering sensory contrast, specifically temperature. Many home cooks make the critical error of serving cold fish on cold rice, resulting in a flat, monotonous, and often “fishy” tasting experience. The magic of a perfect nigiri bite comes from the contrast of chilled, firm fish against a bed of rice that is at or slightly above body temperature. This subtle warmth makes the rice’s vinegar seasoning more aromatic and causes the fat in the fish to melt ever so slightly in your mouth, releasing its full flavor.
This is why you should never, under any circumstances, refrigerate your seasoned sushi rice. Doing so makes the grains hard and dulls the flavor of the vinegar. Instead, keep the freshly made rice in a wooden or non-metallic bowl, covered with a damp cloth, to maintain its warmth and texture. The fish, on the other hand, should be kept chilled right up until the moment of assembly. The ideal is to achieve restaurant-quality nigiri with 55°F fish on 90°F rice. This precise temperature differential is a hallmark of high-end sushi preparation.
By slicing your fish straight from the refrigerator and immediately placing it on the warm rice, you create a dynamic sensory experience. The slight temperature shock awakens the palate and elevates the entire dish from a simple combination of ingredients to a composed culinary moment. It’s a simple step that requires timing but no special equipment, embodying the essence of resourceful precision.
Action Plan: Perfect Temperature Staging Timeline
- Finish making and seasoning your sushi rice, then allow it to cool for about 15 minutes until it’s comfortably warm to the touch.
- Keep the rice at room temperature under a damp cloth while you prepare other ingredients. Never refrigerate it.
- Slice the fish straight from the refrigerator just before you are ready to assemble the nigiri.
- Form the nigiri immediately after slicing the fish, pressing the cold slice onto the warm rice ball.
- Serve the completed nigiri within two hours to ensure optimal flavor, texture, and food safety.
What Simple Glaze Can Make Dull Fish Look Like Restaurant Quality?
Walk into any high-end sushi restaurant, and you’ll notice that the nigiri arrives with a beautiful, subtle sheen. That glossy finish isn’t just from the freshness of the fish; it’s often a light brushing of *nikiri*, a sweet and savory finishing glaze. This simple condiment is a game-changer for homemade nigiri, instantly elevating the look of supermarket fish from dull to dazzling. More importantly, it adds a perfectly balanced layer of seasoning, meaning your guests won’t need to dredge their sushi in a bowl of soy sauce.
Unlike straight soy sauce, nikiri is a more complex, thinned-down, and slightly sweetened mixture. It’s designed to complement the fish, not overpower it. As the experts at Crafty Cookbook note, a chef’s recipe is often a guarded secret, but a fantastic version can be easily made at home.
Nikiri sauce is made with soy sauce, and typically has mirin and sake added. A sushi chef’s nikiri recipe is often a closely guarded secret.
– Crafty Cookbook, How to Make Nigiri Sushi Guide
Making your own nikiri is a simple act of strategic investment in flavor. By simmering soy sauce with mirin (sweet rice wine) and sake, you cook off the harshness of the alcohol and create a syrupy, umami-rich glaze. Adding a small piece of *kombu* (dried kelp) during simmering deepens the flavor even further. This glaze not only makes the fish look incredibly appealing but also seasons it perfectly, unifying the entire bite.
Here’s how to make a professional-style nikiri glaze at home:
- In a small pot, combine equal parts soy sauce and mirin.
- Add a splash of sake (about 1 tablespoon per 1/4 cup of soy sauce) to provide depth.
- Add a small piece of kombu to the pot for a boost of natural umami.
- Simmer the mixture gently over low heat for about 5 minutes, or until it has slightly thickened.
- For an advanced twist when serving white fish, you can infuse the warm glaze with a strip of yuzu peel for five minutes before using.
- Let it cool, then brush a very thin layer onto the fish just before serving.
Why Spending $10 More on Nori Changes the Dish More Than Expensive Rice?
When assembling a home sushi pantry, most people assume the rice brand is a critical investment. While good rice is important, a resourceful chef knows where a small upgrade makes the biggest impact. Paradoxically, for dishes that use it, spending a little extra on high-quality *nori* (seaweed) and, most importantly, premium rice vinegar will transform your sushi far more than splurging on an expensive bag of rice. The vinegar is the “soul” of the sushi rice, and premium nori provides a textural and flavor dimension that cheap versions simply cannot match.
High-quality nori is a revelation. It’s deep, dark green (almost black), with a uniform, glossy sheen. It should be crisp enough to snap cleanly, not bend or tear like the papery, pale green sheets often sold in standard grocery stores. The flavor is complex, with notes of toasted nuts and a profound savory umami that cheap nori lacks. While traditional nigiri doesn’t use nori, it becomes essential for *gunkanmaki* (“battleship” sushi) or *temaki* (hand rolls), which are perfect vehicles for using the less-than-perfect off-cuts from slicing your fish.
This is the essence of strategic investment. You can use a perfectly acceptable, mid-range short-grain rice, but if you season it with a cheap, harsh rice vinegar, the foundation of your sushi will be flawed. A good rice vinegar is smooth, with a balanced acidity and a hint of sweetness. By prioritizing these two flavour-critical components, you ensure every bite of sushi you make—from nigiri to maki—is built on a superior foundation of taste.
When planning your shopping, follow this hierarchy of investment:
- High-Quality Rice Vinegar: This is the single most important ingredient for the flavor of your sushi rice.
- Premium Nori: For utilizing off-cuts in other sushi types, its crisp texture and umami are crucial.
- Fish Quality: Select the best-looking fish available at your market, using the techniques in this guide.
- Rice Grain Brand: A standard Japanese short-grain rice will perform beautifully if the vinegar is good.
The Pricing Error That Makes People Think Sushi Can’t Be Cheap and Good
There’s a deeply ingrained psychological bias that equates high cost with high quality, especially with sushi. A $5 piece of salmon nigiri at a restaurant feels like a justifiable indulgence, while the idea of making it at home for less than a dollar seems suspicious. This pricing error clouds our judgment and prevents many from realizing the incredible value and quality achievable in a home kitchen. The reality is, the majority of what you pay for in a restaurant is labor, ambiance, and overhead—not just the raw ingredients.
When you take on the role of the chef, you reclaim that value. A single pound of sashimi-grade salmon, which might cost around $20 at a good supermarket, can yield approximately 16 generous pieces of nigiri. At a restaurant, those 16 pieces could easily cost $60-$80. The initial investment in pantry staples like quality rice vinegar, soy sauce, and rice (around $25-$30) pays for itself after just one or two sushi-making sessions.
This cost analysis demonstrates the immense financial benefit of the DIY approach. By mastering a few key techniques, you are not just making “cheap” sushi; you are making high-quality sushi in an incredibly cost-effective way. Every part of your purchase is maximized, especially when you adopt a zero-waste mindset and transform the off-cuts from your nigiri slicing into a delicious spicy salmon mix for maki rolls or a small poke bowl for the next day’s lunch.
This table breaks down the cost comparison, highlighting the dramatic savings.
| Item | Restaurant Cost | Home Cost | Savings |
|---|---|---|---|
| Single Salmon Nigiri | $3.50-5.00 | $0.75-1.25 | 70-75% |
| 8-Piece Nigiri Set | $28-40 | $6-10 | 75-78% |
| Sashimi-Grade Salmon/lb | N/A | $19.99 | Makes ~16 pieces |
| Initial Investment (rice, vinegar, etc.) | N/A | $25-30 | Pays for itself after 2nd use |
Key Takeaways
- A 10-minute salt cure is the most effective way to improve the texture and flavor of supermarket salmon.
- The ideal sensory experience comes from the contrast of chilled fish (55°F) served on warm, body-temperature rice (90°F).
- Invest your money in high-quality rice vinegar and nori before splurging on expensive rice brands for the biggest flavor impact.
How to Identify True Sashimi-Grade Fish at Your Local Market?
Now that you’re armed with the techniques to transform good fish into great nigiri, the final piece of the puzzle is selecting the best possible raw material from your local market. The term “sushi-grade” is not regulated by the FDA, so you can’t rely on a label alone. Instead, you need to become a fish detective, using your senses to identify freshness and quality. The safest and most widely available options at a typical supermarket are farm-raised Atlantic salmon and previously-frozen Ahi tuna steaks.
Food safety is paramount. To be safe for raw consumption, fish must be frozen to kill parasites. The FDA guideline, though aimed at commercial suppliers, is a great benchmark: the FDA requires fish be frozen at -4°F for 7 days. This is why “previously frozen” is often a sign of safety, not a lack of quality, especially for wild-caught fish. When in doubt, always ask the person at the fish counter if the fish is suitable for raw consumption. They are your best resource.
Beyond safety, you’re looking for signs of freshness. The flesh should be firm and spring back when you press it lightly. It should have a vibrant, translucent color—not dull, opaque, or darkened at the edges. Most importantly, trust your nose. Fresh, high-quality fish should smell like the clean ocean or even faintly of cucumber. It should never smell “fishy”; that’s a sign of decay. Avoid any fish that is sitting in a milky liquid or has an ammonia-like odor.
Use this checklist on your next trip to the supermarket:
- Flesh: Is it firm and resilient to the touch?
- Color: Is it bright and translucent?
- Smell: Does it smell clean and briny, or fishy?
- Packaging: For frozen products, is the vacuum seal completely intact with no signs of ice crystals or freezer burn?
- Eyes & Gills (for whole fish): Are the eyes clear and bulging, and are the gills bright red?
By focusing on these clever techniques—curing, slicing, temperature control, and strategic seasoning—you can confidently turn accessible supermarket ingredients into a truly excellent nigiri experience. It’s not about spending more; it’s about cooking smarter.