The secret to a perfect uramaki roll isn’t just technique, but understanding the physics of adhesion and structure.
- Master the non-stick surface by properly wrapping your bamboo mat in heavy-duty plastic wrap.
- Control structural integrity with the precise rice-to-nori ratio, preventing blowouts and instability.
- Use moisture (tezu) as a lubricant to eliminate knife friction, ensuring perfectly clean cuts.
Recommendation: Focus on controlling moisture and pressure at every single stage, from spreading the rice to making the final slice.
The moment of truth arrives. You lift the bamboo mat, expecting a perfectly formed, beautiful inside-out roll. Instead, you’re met with a sticky, misshapen log, rice clinging stubbornly to your mat, your hands, and everything in between. It’s a common frustration for any intermediate cook graduating from simple maki to the more ambitious uramaki. The standard advice—”just wet your hands” or “use plastic wrap”—is a starting point, but it rarely solves the core problem. It addresses the symptom, not the cause.
This frustration stems from a misunderstanding of what’s really happening. Rolling uramaki is less about a secret recipe and more about managing basic physics: friction, adhesion, and structural integrity. The exposed rice is an inherently unstable element, and controlling it requires a different mindset. Instead of simply following steps, you need to understand *why* each step works. Why does a certain type of plastic wrap perform better? How does the amount of rice dictate the roll’s final stability? Why does a wet knife glide through while a dry one tears?
But what if the key wasn’t just in the ingredients, but in the material science of your tools and the mechanical forces you apply? This guide will deconstruct the uramaki roll, moving beyond generic tips to give you the instructor’s perspective. We will explore the essential role of your rolling surface, the precise engineering of rice quantity, the techniques for adding toppings without compromising structure, and the science behind a clean, perfect cut. By the end, you won’t just know how to roll uramaki; you’ll understand the mechanics to troubleshoot any issue and achieve consistent, beautiful results.
To guide you through this process, this article breaks down each critical stage. We will cover everything from preparing your workspace to the final, satisfying slice, turning a frustrating task into a mastered skill.
Summary: How to Roll Uramaki Without Rice Sticking to Your Mat or Hands?
- Why You Need to Wrap Your Bamboo Mat in Plastic Wrap Before Rolling?
- Why Is Heavy-Duty Plastic Wrap Essential for Rolling Inside-Out Sushi?
- How Much Rice Is Too Much for a Standard Uramaki Roll?
- Classic Roll or Inside-Out: Which One Is Actually Harder to Roll?
- California or Dragon Base: Which Uramaki Structure Is More Stable?
- How to Make Avocado Slices Stick to the Outside of the Roll?
- The Water-Dipping Trick That Prevents Your Knife From Tearing the Rice
- White or Black Sesame: Which Roasting Profile Suits Spicy Tuna Best?
Why You Need to Wrap Your Bamboo Mat in Plastic Wrap Before Rolling?
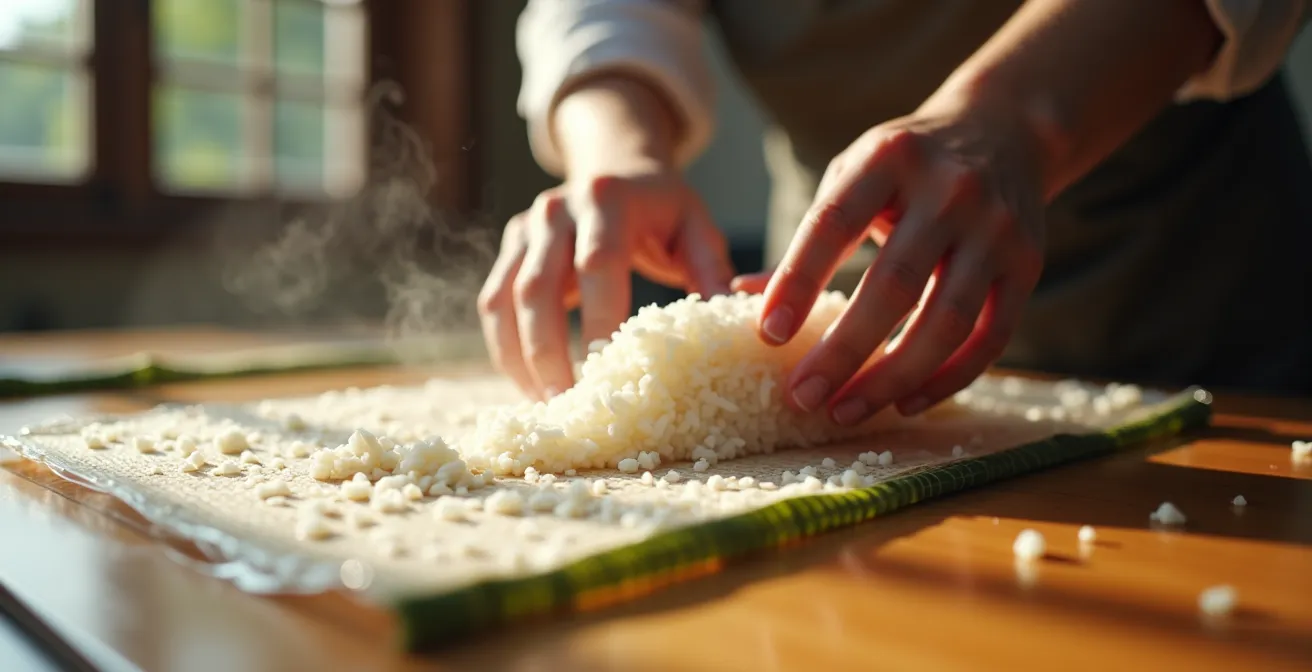
Before a single grain of rice is touched, the foundation of a successful uramaki roll is set: your rolling surface. Skipping the step of wrapping your bamboo mat (makisu) in plastic is the first, and most critical, mistake you can make. The reason is twofold, involving both hygiene and mechanics. From a food safety perspective, the porous nature of bamboo is a significant concern. In fact, food safety research shows that traditional bamboo mats can harbor bacteria and develop black mold over time due to trapped moisture and food particles. Plastic wrap creates an essential non-porous barrier, ensuring your preparation is clean and safe.
Mechanically, an unwrapped bamboo mat is your enemy in the fight against stickiness. The rough, uneven surface of the bamboo offers countless points for the starchy sushi rice to grab onto. This creates immense friction, making it nearly impossible to lift and roll the delicate nori and rice sheet without it tearing or sticking. The plastic wrap transforms this high-friction surface into a smooth, low-friction plane. This allows the roll to glide as you shape it, giving you the control needed for a tight, uniform cylinder.
The choice of wrap matters, but even a standard household wrap is better than none. Some chefs even prefer using a large, gallon-sized ziplock bag cut open, as its thickness offers a good balance of durability and flexibility. The key is to ensure the mat is completely covered, with the excess plastic tucked neatly underneath to prevent it from shifting during rolling. This simple preparation is not just a “nice-to-have”; it is the non-negotiable first step in mastering the inside-out roll.
Why Is Heavy-Duty Plastic Wrap Essential for Rolling Inside-Out Sushi?
Once you’ve accepted the necessity of wrapping your mat, the next level of mastery comes from understanding that not all plastic wraps are created equal. Using a thin, cheap, or generic store-brand wrap can lead to its own set of frustrations. These films tear easily under the pressure of rolling, snag on the bamboo, and can even get trapped inside your finished roll, creating an inedible mess. This is where heavy-duty plastic wrap becomes a game-changer. Brands known for their sturdiness, like Saran or Glad, provide a resilient, high-tensile surface that can withstand the shaping process without ripping.
The plastic wrap does more than just prevent sticking; it becomes an extension of your hands. It allows you to apply firm, even pressure to the roll without ever directly touching the sticky rice. You can grip the edges of the mat and the overhanging plastic to guide, tuck, and tighten the roll with precision. As you complete the roll, the technique is to pull the plastic wrap away and upwards, ensuring it peels cleanly from the rice surface instead of being rolled into the seam. This creates the clean separation necessary for a structurally sound roll.
The importance of a non-stick surface is so critical that it has driven innovation in the culinary world. This is perfectly illustrated in the following example.
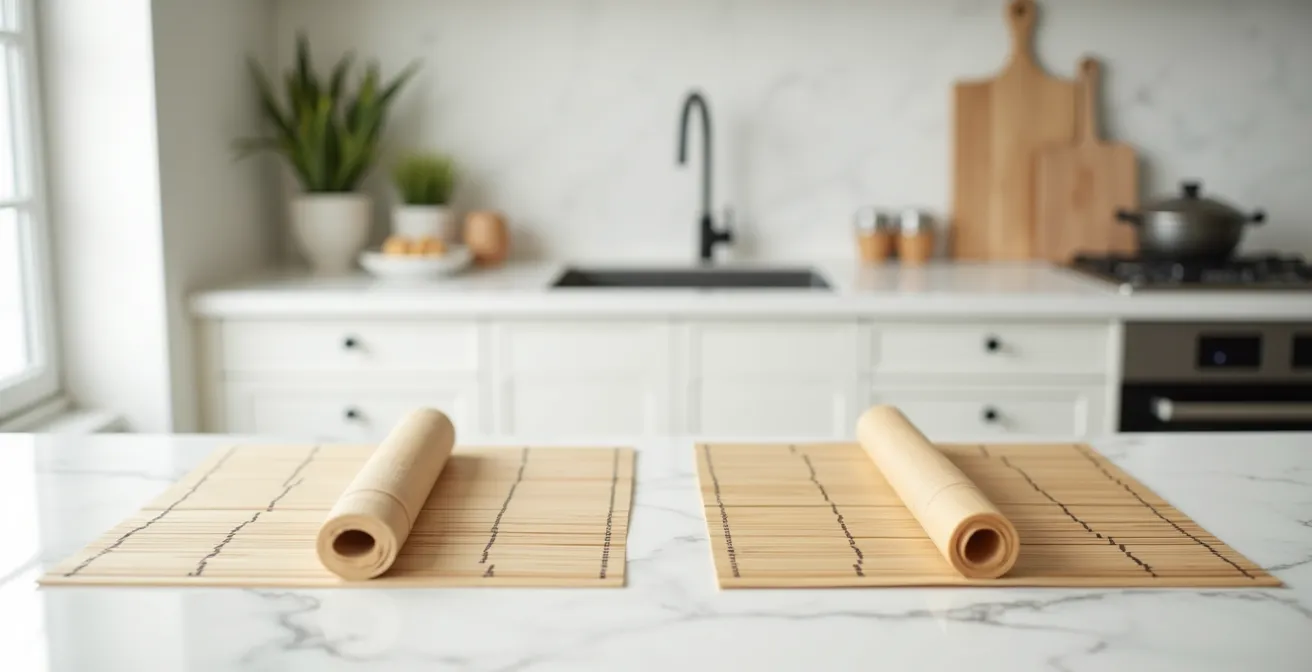
Hasegawa’s Innovation in Non-Stick Sushi Mats
The Japanese manufacturer Hasegawa developed plastic sushi mats that eliminate the need for plastic wrap entirely. These mats, which don’t generate splinters or black mold like bamboo versions, feature an embossed strip surface to which rice is less likely to stick. This innovation demonstrates how material science directly impacts sushi preparation efficiency, proving that the quality and texture of your rolling surface are paramount.
For those of us without a specialized Hasegawa mat, a high-quality, heavy-duty plastic wrap is the most accessible way to replicate this professional-grade, low-friction environment. It’s a small investment that pays huge dividends in control and consistency.
How Much Rice Is Too Much for a Standard Uramaki Roll?
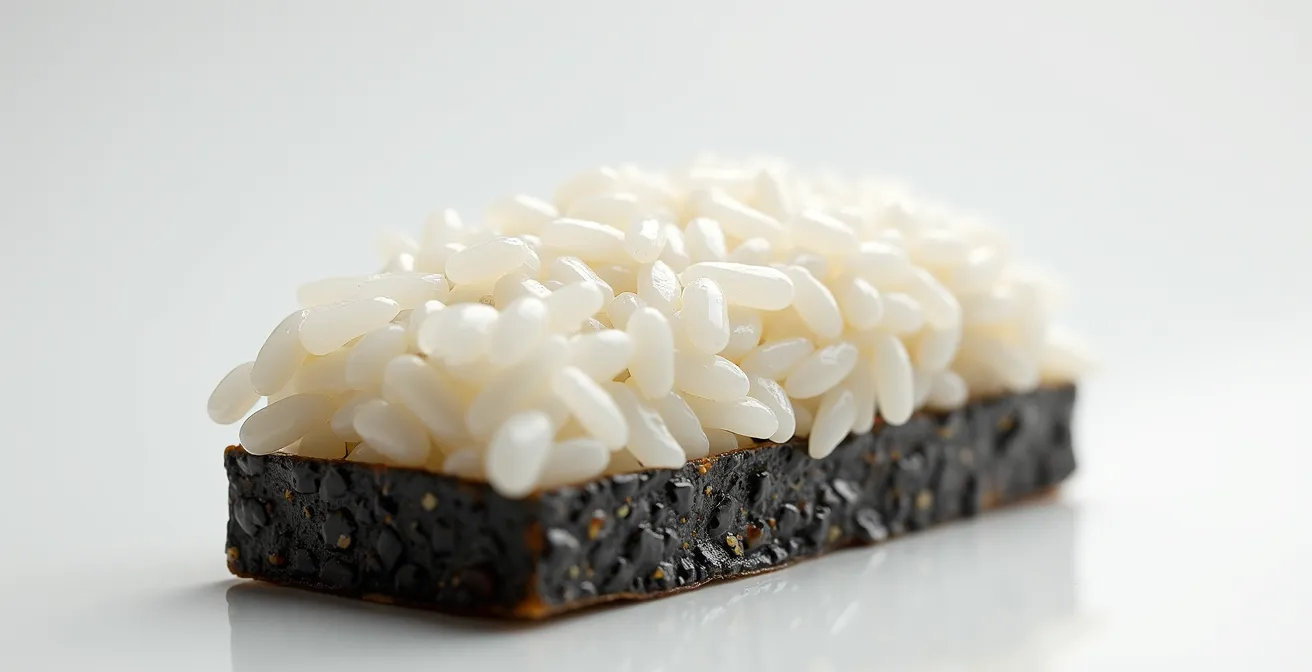
With a perfectly wrapped mat, your next challenge is the rice itself. The single most common mistake beginners make with uramaki is using far too much rice. It seems intuitive to lay down a thick, generous layer to ensure full coverage, but this is a structural trap. Too much rice creates a roll that is difficult to close, prone to blowouts, and has an imbalanced texture. The goal is a delicate, even layer just thick enough to hide the dark nori beneath—no more. It’s a matter of engineering, not just quantity.
For a standard half-sheet of nori, professional sushi guidelines recommend using 110-130 grams (approximately 1 cup) of prepared sushi rice. This precise amount ensures the final roll has the correct ratio of rice to filling, leading to structural stability. A layer of rice that is roughly 5mm thick is the ideal. Spreading the rice evenly, without compressing the grains too much, is crucial. You want the grains to adhere to the nori and to each other, but not be mashed into a paste. Leaving a small, rice-free border at the top edge of the nori can also help create a cleaner seal when you finish the roll.
As one experienced home cook noted on a popular forum, “A tip for anyone new to making uramaki: the most common mistake is to use way too much rice. Just enough that you can’t see the green of the nori through the rice is ideal.” This simple visual cue is perhaps the best guide. If your roll is cracking or the filling is being squeezed out, the first thing to troubleshoot is always the quantity of rice.
Action Plan: Achieving the Perfect Rice Layer
- Weigh your rice: Aim for 110-130g of cooked sushi rice per half-sheet of nori for structural balance.
- Moisten your hands: Use ‘tezu’ (vinegared water) to prevent rice from sticking to your fingers during spreading.
- Spread gently: Use your fingertips to press the rice into an even 5mm layer, avoiding mashing the grains.
- Check for coverage: Ensure the rice layer is opaque enough that the green nori is no longer visible.
- Leave a border: Keep a 1/2-inch rice-free strip along the top edge of the nori to ensure a clean seal.
Classic Roll or Inside-Out: Which One Is Actually Harder to Roll?
It’s a frequent debate in home-sushi circles: which roll is the true test of skill? While a perfectly executed classic roll (maki) requires significant finesse, most find the uramaki to be more challenging at the outset. The difficulty lies not in the rolling motion itself, but in the management of the primary obstacle: the exposed, sticky rice. In a classic maki, the rice is contained within the nori, which acts as a clean, manageable outer layer. Any imperfections in the rice are neatly hidden away. With uramaki, the stickiness is the main event, demanding immediate mastery of moisture and handling.
This added complexity is why many instructors suggest starting with classic rolls. Anecdotal evidence from home sushi makers often reveals that hosomaki (thin classic rolls) are easier for beginners to master, allowing them to hone their rolling and tucking skills without the added variable of a sticky exterior. The uramaki’s exposed rice makes it difficult to handle, adjust, and pick up, adding a layer of finesse that can be frustrating for newcomers.
The difficulty is simply of a different nature. Classic maki presents a mechanical challenge: mastering the initial tuck to create a tight core without crushing the ingredients. Uramaki, on the other hand, presents a finesse challenge: managing the sticky surface, achieving an aesthetic outer layer, and applying toppings. For maki, a slightly imperfect rice layer is forgivable; for uramaki, it’s immediately visible and can compromise the entire roll. The margin for error is simply much smaller when your main ingredient is on the outside.
California or Dragon Base: Which Uramaki Structure Is More Stable?
Not all uramaki are built the same. The internal and external components dramatically affect a roll’s stability. Comparing a basic California roll to a topped Dragon roll provides a perfect lesson in structural engineering. The California roll, with its filling entirely contained, is inherently more stable. Its “load” (the filling) is held internally by the nori, which acts as a reinforcing cylinder. The center of gravity is low and central, and the risk of failure is minimal. It’s a self-contained system that is more forgiving of slight imperfections in rice quality or rolling pressure.
The Dragon roll, by contrast, is a more complex structure. Its stability is immediately compromised by the “external load”—the layers of avocado or eel placed on top. This design raises the center of gravity and relies entirely on the surface adhesion of the toppings to the rice. If the rice isn’t perfectly tacky, or if too much pressure is applied, the toppings can slide off or detach during cutting. This makes the Dragon roll less forgiving and more dependent on perfect rice quality.
As one professional analysis puts it, “The California roll is more stable because its ‘load’ (the filling) is internally contained by the nori ‘reinforcement’. The Dragon roll’s stability is compromised by its ‘external load’ which relies solely on surface adhesion.” This highlights the different forces at play. For a California roll, you’re building a contained structure; for a Dragon roll, you’re building a foundation that must support an external element. The following table breaks down this structural comparison.
| Aspect | California Roll | Dragon Roll |
|---|---|---|
| Internal Structure | Nori forms complete cylinder | Nori integrity challenged by moisture |
| Center of Gravity | Low and central | Raised by external toppings |
| Load Distribution | Internal containment by nori | External load relies on surface adhesion |
| Failure Risk | Very low – self-contained | Higher – toppings can detach |
| Rice Quality Tolerance | More forgiving | Requires perfect tackiness |
This is why mastering a simple uramaki like a California roll is a prerequisite. It teaches you to create a stable rice-on-the-outside base before adding the complexity of external toppings, as demonstrated in a classic California roll recipe.
How to Make Avocado Slices Stick to the Outside of the Roll?
Applying toppings like thin slices of avocado or fish to the outside of an uramaki roll is a true test of finesse. The key is creating the perfect level of tackiness on the rice surface. If the rice is too wet, the avocado will slide right off. If it’s too dry, it won’t adhere at all. The professional trick is to let the surface of the spread rice air-dry for 30 to 60 seconds after you’ve flipped it over. This allows a slightly sticky ‘skin’ to develop, creating the ideal surface for adhesion.
Once the roll is formed (but before cutting), you fan out your thin avocado slices so they overlap slightly on top. Don’t try to press them on individually. Instead, lay the fanned-out sheet of avocado over the roll, then cover it with the plastic wrap you used for rolling. Now, use your bamboo mat to apply gentle, even pressure along the entire length of the roll. This action presses the avocado firmly into the rice surface, embedding it just enough to secure it without mashing it.
This technique of using plastic wrap post-rolling serves a dual purpose. As noted by professional chefs, wrapping the completed uramaki in cling film not only helps to keep toppings firmly in place but also tightens the roll’s overall shape and makes the subsequent slicing much cleaner. This ensures that the toppings remain intact and the rice maintains its structural integrity during the final, crucial step of cutting. It’s a simple but highly effective technique for achieving a professional, restaurant-quality finish.
The Water-Dipping Trick That Prevents Your Knife From Tearing the Rice
You’ve built a beautiful, structurally sound uramaki roll. The final hurdle, and where many rolls meet their demise, is the cut. Using a dry knife on sticky sushi rice is like trying to cut a marshmallow with a butter knife—it will drag, tear, and compress, ruining the round shape you worked so hard to create. The solution is simple: moisture and a sharp blade. A very sharp knife is non-negotiable; a dull blade will crush the roll no matter how wet it is. A long Japanese sushi knife (yanagiba) is ideal, but a sharp chef’s knife will also work.
The magic ingredient is the water you dip it in. While plain water works, professionals use a special vinegared water called ‘tezu’. This mixture not only prevents sticking but also helps to preserve the flavor of the rice. The traditional Japanese tezu mixture uses a ratio of about 1/4 cup rice vinegar to 1 cup water. Keep a tall glass of this mixture nearby and dip your knife before *every single cut*. Don’t just dip the tip; wet the entire length of the blade. This thin film of water acts as a lubricant, dramatically reducing the friction between the steel and the starchy rice.
The cutting motion is just as important. Never use a sawing motion. Instead, execute one long, gentle drawing motion from the heel of the blade to the tip, letting the weight of the knife do the work. After each cut, wipe the blade clean with a damp towel to remove any starchy residue. For an extra-clean cut, especially on rolls with toppings or sauces, many chefs cut the roll while it is still wrapped in its plastic film, removing the plastic only after the pieces are separated. This trick contains everything perfectly, guaranteeing a flawless presentation.
Key Takeaways
- Master the Surface: Always wrap your bamboo mat in heavy-duty plastic to create a non-porous, low-friction rolling plane.
- Control the Volume: Use a precise amount of rice (110-130g per half nori sheet) to ensure structural stability and avoid blowouts.
- Leverage Moisture: Use ‘tezu’ (vinegared water) on your hands to spread rice and on your knife to ensure clean, drag-free cuts.
White or Black Sesame: Which Roasting Profile Suits Spicy Tuna Best?
The final touch on many uramaki rolls is a coating of toasted sesame seeds, which adds texture, flavor, and visual appeal. The choice between white and black sesame seeds is more than just aesthetic; it’s a decision about flavor and textural profiles, especially when paired with a bold filling like spicy tuna. White sesame seeds, which are hulled, have a milder, sweeter nuttiness. When toasted, they become delicately crisp. Their smaller size allows them to form a more complete crust, offering better overall adhesion to the rice.
Black sesame seeds, which are unhulled, offer a starkly different experience. They have a more pronounced, sandy crunch and a deeper, earthier, and slightly more bitter flavor profile. Their larger size means they create more gaps when coating a roll, but they provide a stronger textural contrast. The choice often comes down to complementing versus contrasting. The mild sweetness of white sesame complements the heat and umami of spicy tuna, while the robust flavor of black sesame stands up to and contrasts with creamy, mayonnaise-based fillings.
Roasting also plays a critical role. According to the Japanese Culinary Institute’s analysis, “A darker roast releases more of the seed’s natural oils. This enhances nutty flavor but can make the seeds slightly less likely to adhere to the rice.” For a spicy tuna roll, a light toasting of white sesame seeds is often ideal. It brings out their nutty notes without releasing too much oil, ensuring they stick to the rice and provide a pleasant, subtle crunch that enhances, rather than overwhelms, the star ingredient.
| Characteristic | White Sesame (Hulled) | Black Sesame (Unhulled) |
|---|---|---|
| Texture | Delicate, nutty crispiness | Sandy, pronounced crunch |
| Adhesion | Better – smaller size creates complete crust | Good – but larger size leaves gaps |
| Oil Release | Less with light roasting | More with darker roasting |
| Flavor Profile | Mild, sweet nuttiness | Deep, earthy, slightly bitter |
| Best For | Complementing spicy tuna | Contrasting with creamy mayo |
By moving from a simple recipe-follower to a technician who understands the forces at play, you can transform the frustrating process of making uramaki into a satisfying and creative skill. Master the mechanics, and the art will follow.
Frequently Asked Questions About How to Roll Uramaki Without Rice Sticking to Your Mat or Hands?
Why does uramaki feel harder for beginners?
The main challenge—sticky rice—is exposed from the beginning, creating more anxiety and requiring immediate mastery of moisture control techniques.
What’s the key difference in difficulty types?
Classic maki has higher mechanical difficulty (mastering the initial tuck), while uramaki has higher finesse difficulty (managing stickiness and aesthetics).
Which roll has more margin for error?
Classic maki is more forgiving – imperfect rice can be hidden inside, but in uramaki, rice quality issues are immediately visible and problematic.