The secret to perfectly separated rice is not rinsing a set number of times, but achieving a specific level of water clarity through controlled surface abrasion.
- The goal is removing excess, sticky surface starch (amylopectin) while preserving the grain’s internal structure and core starch (amylose).
- Factors like soaking time, water temperature, and even mineral content in your water are as critical as the rinsing process itself.
Recommendation: Focus on observing the water’s transparency and protecting the integrity of each grain, rather than rigidly counting rinses.
For any cook dedicated to the craft, there are few frustrations as profound as a pot of mushy, clumpy rice. You followed the instructions, you measured carefully, yet the result is a sticky mass instead of the distinct, fluffy grains you envisioned. The common advice echoes in every kitchen: “rinse your rice 3 to 5 times,” or the even more ambiguous, “rinse until the water runs clear.” But for those whose rice is still too starchy or, conversely, has been washed so vigorously it breaks apart, this advice is clearly insufficient.
This ambiguity is a point of failure because it treats a delicate scientific process like a chore. The reality is that preparing perfect rice is an exercise in starch management. It’s about understanding the difference between the starches on the surface of the grain and those within. It involves controlling hydration, temperature, and even the chemistry of your water. But what if the true key wasn’t about the number of rinses at all, but about mastering the physics of water absorption and the chemistry of starch gelatinization?
This guide abandons generic advice. We will deconstruct the entire process from a grain specialist’s perspective, focusing on the obsessive details that separate good rice from flawless rice. We will explore the precise visual cues for rinsing, the science behind soaking, the impact of your cooking vessel, and the techniques that protect each grain’s integrity until it reaches the plate.
This article provides a detailed roadmap for mastering each stage of rice preparation. The following sections break down the science and technique behind achieving perfect grain separation, from the initial wash to the final mix.
Summary: A Scientific Approach to Flawless Rice
- Clear or Milky: How Transparent Should the Water Be Before Cooking?
- 30 Minutes or 60 Minutes: How Long Should Rice Absorb Water Before Heat?
- Why Use Less Water for Sushi Rice Than for Table Rice?
- Soft Water vs. Hard Water: How Mineral Content Affects Rice Texture?
- Rice Cooker or Donabe Pot: Which Vessel Keeps Shari at Body Temperature Longer?
- Why Your Rice Becomes Mushy When Mixed With Vinegar Too Slowly?
- How to Use a Wooden Ohitsu to Regulate Rice Humidity and Heat?
- Why the ‘Cut-and-Fold’ Mixing Motion Prevents Mushy Rice?
Clear or Milky: How Transparent Should the Water Be Before Cooking?
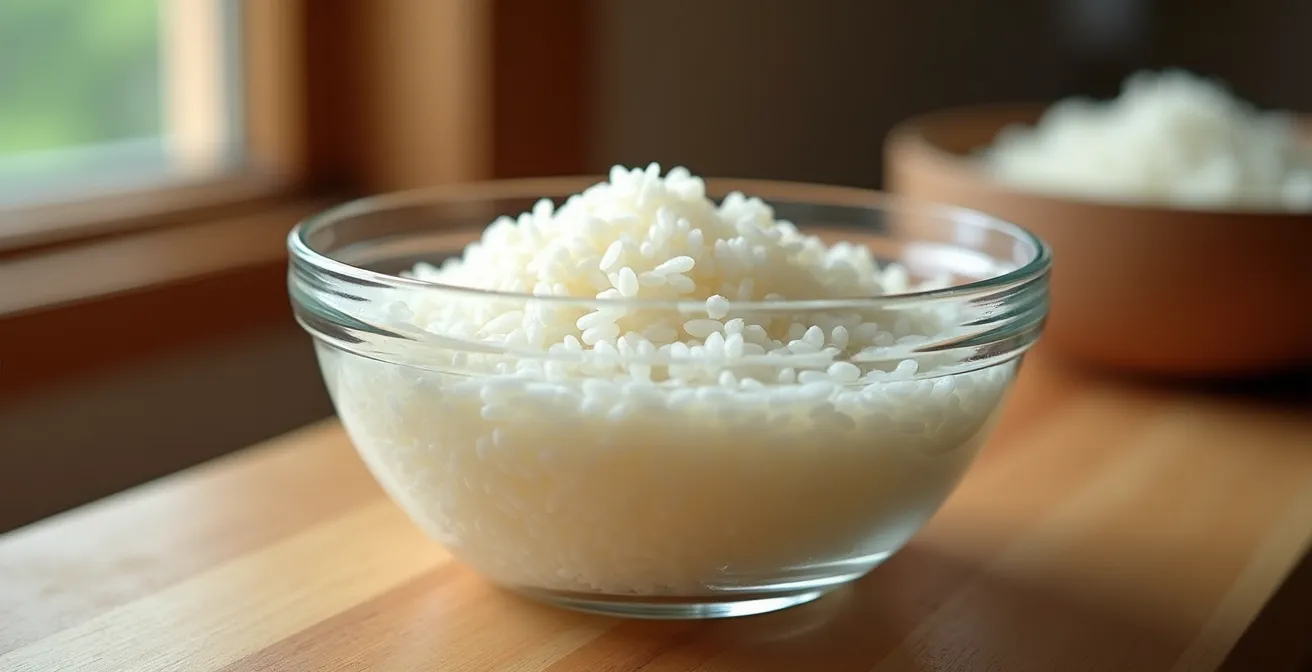
The instruction “rinse until the water runs clear” is the most common and most misleading advice in rice cookery. The objective is not to achieve drinking-water clarity, which would require over-washing and damaging the grains. The goal is controlled removal of excess surface starch. Rice grains are coated in a fine powder of loose starch, primarily sticky amylopectin, which is a byproduct of the milling process. If left on, this starch dissolves in the cooking water, creating a glue that binds the grains together into a gummy mass.
The rinsing process is one of gentle abrasion. Using cold water is critical; warm water would begin to gelatinize the surface starch, making it even stickier. As you gently swirl the rice with your fingertips, the grains rub against each other, dislodging this powdery starch into the water, turning it milky white. The ideal endpoint is when the water is no longer opaque and milky, but rather translucent—you should be able to vaguely see your fingers or the grains through the water. This indicates you’ve removed the majority of the loose, problematic starch without stripping the grain itself.
The type of starch within the grain is what provides structure. High-quality short-grain rice, for instance, has a high amylose content which helps it maintain its shape. One study found a specific variety to have an amylose content of 39.34%, which contributes to a firm, resilient texture. Over-washing can start to leach these essential inner starches and cause micro-fractures in the grain, leading to a mushy and broken final product. Therefore, focus on the transition from milky to translucent, not the impossible pursuit of “clear.”
30 Minutes or 60 Minutes: How Long Should Rice Absorb Water Before Heat?
Soaking is a non-negotiable step for achieving a uniform texture. It allows the grains to hydrate slowly and evenly from the outside in, a process that ensures the core of each grain cooks at the same rate as its exterior. Skipping this step is a primary cause of unevenly cooked rice: a mushy exterior with a hard, undercooked center. The water penetrates the grain, creating a hydration gradient that prepares the internal starches for gelatinization when heat is applied.
A 30-minute soak at room temperature is a common baseline and is effective for most standard table rice. However, for the discerning cook seeking superior texture and flavor, both time and temperature are variables to be manipulated. Lengthening the soaking time allows for deeper and more thorough hydration. But temperature plays an equally crucial role. Soaking in colder water slows down the enzymatic activity in the rice, preserving its flavor and integrity over a longer hydration period.
This principle of low-temperature soaking is taken to its logical extreme by some sushi masters. The precision of this technique is highlighted by food scientist Naoki Higuchi, who determined that soaking for 120 minutes at 5℃ resulted in the best taste and texture. This meticulous approach ensures maximum, even hydration without any premature starch breakdown, yielding a perfectly cooked grain that is both resilient and tender. For the home cook, even extending a room-temperature soak to 60 minutes will yield a noticeably superior result compared to a mere 30 minutes.
Why Use Less Water for Sushi Rice Than for Table Rice?
Adjusting the water-to-rice ratio is fundamental, and nowhere is this more critical than in the preparation of shari (sushi rice). While a standard ratio for plain table rice might be 1.25 parts water to 1 part rice, sushi rice demands a drier, firmer starting point. For this reason, many professional sushi chefs recommend a 1:1 ratio of water to uncooked rice by weight, or even slightly less. This deliberate reduction is not an arbitrary choice; it is a calculated step to prepare the grains for their final seasoning.
The primary reason for using less water is to account for the sushizu—the vinegar, sugar, and salt mixture that will be added after cooking. This seasoned vinegar is a liquid that the hot rice will absorb. If the rice were already cooked to its maximum water capacity, the addition of sushizu would oversaturate the grains, breaking down their structure and turning the final product into a mushy, unusable paste. The goal is to cook the rice to a slightly firmer state known as katame.
This katame texture ensures each grain has enough structural integrity to absorb the vinegar seasoning while remaining distinct and separate. The acidic nature of the vinegar tightens the grain’s surface, giving it a characteristic sheen and a pleasant al dente mouthfeel. By starting with less water, you create the necessary capacity for this final, crucial absorption step, resulting in glossy, perfectly seasoned sushi rice where every grain is a testament to precision.
Action Plan: Achieving the Perfect Sushi Rice Water Ratio
- Initial Ratio: Start with a 1:1 water-to-rice ratio by volume for a stovetop method. For a rice cooker, use the “sushi” setting or reduce water to just below the corresponding line.
- Weigh Your Seasoning: Prepare your sushizu. As a rule of thumb, anticipate that the rice will absorb an additional 10-12% of its cooked weight in liquid from the vinegar mixture.
- Target Texture: Cook the rice with the reduced water amount. The goal is ‘katame’—a texture that is fully cooked but noticeably firmer and drier than regular steamed rice.
- Post-Cooking Assessment: Before adding vinegar, check the rice. It should not be wet or overly soft. The grains should be separate and hold their shape perfectly.
- Incorporate & Absorb: While the rice is hot, quickly mix in the sushizu using a cutting motion. The firm grains will now have the capacity to absorb this liquid without turning mushy.
Soft Water vs. Hard Water: How Mineral Content Affects Rice Texture?
The ideal water for cooking rice is a variable often overlooked, yet its chemical composition has a profound impact on the final texture. The “hardness” of water is determined by its concentration of dissolved minerals, primarily calcium and magnesium. These minerals directly interact with the starch molecules in the rice, altering how they hydrate and cook.
Soft water, which has a low mineral content (0-60 mg/L), is the gold standard for cooking rice. It allows for unimpeded hydration, letting water penetrate the grains evenly and efficiently. This results in rice that is fluffy, with well-separated grains and a tender mouthfeel. The starches can swell and gelatinize without interference, leading to a clean and pure expression of the rice’s natural texture.
Conversely, hard water (121-180 mg/L or higher) can be problematic. The calcium and magnesium ions form bonds with pectin molecules in the rice’s cell walls, reinforcing them and making them more resistant to breaking down. This inhibits water absorption, leading to a final product that is often firm, less fluffy, and can cook unevenly. In cases of very hard water, the grains may feel hard or chalky no matter the cooking time. Understanding your local water quality is therefore a key diagnostic tool for troubleshooting textural issues in rice.
The following table, based on principles of food science, outlines the effects of water hardness on rice and provides solutions. An analysis of cooking parameters confirms that mineral content is a significant factor in achieving optimal texture.
| Water Type | Mineral Content | Rice Texture Result | Recommended Solution |
|---|---|---|---|
| Soft Water | 0-60 mg/L | Fluffy, separate grains | Use as is |
| Moderately Hard | 61-120 mg/L | Slightly firmer | Increase soaking time |
| Hard Water | 121-180 mg/L | Firm, less fluffy | Use activated charcoal filter |
| Very Hard | >180 mg/L | Hard, uneven cooking | Use bottled spring water |
Rice Cooker or Donabe Pot: Which Vessel Keeps Shari at Body Temperature Longer?
The choice of cooking vessel is a declaration of intent. A modern, high-end rice cooker represents a pursuit of technological perfection and consistency, while a traditional donabe (earthenware pot) embodies a connection to craft and nuance. When it comes to maintaining the ideal temperature for shari—roughly body temperature—both have unique advantages rooted in their material properties.
A premium rice cooker excels at maintaining a precise, stable temperature over long periods. Its insulated inner chamber and “keep warm” functions are specifically engineered for this. Advanced models even incorporate features that mimic traditional methods. As Tiger Corporation notes about its advanced cookers:
The ‘rice bin humidity control’ function, modeled after the air and moisture control properties of wooden rice containers known as ohitsu, increases the amount of air fed into the chamber… improving the heat retention quality… odors and yellowing are prevented, preserving the delicious flavors of freshly cooked rice.
– Tiger Corporation, Press Release – ご泡火炊き Series
On the other hand, the donabe, particularly those from the Iga province in Japan, offers a different kind of thermal performance. The porous clay from which Iga-yaki pots are made has exceptional heat retention capabilities. Once heated, the thick-walled pot radiates a gentle, even heat long after it has been removed from the stove. This slow, passive release of heat is perfect for keeping rice at a warm, stable temperature without any additional power.
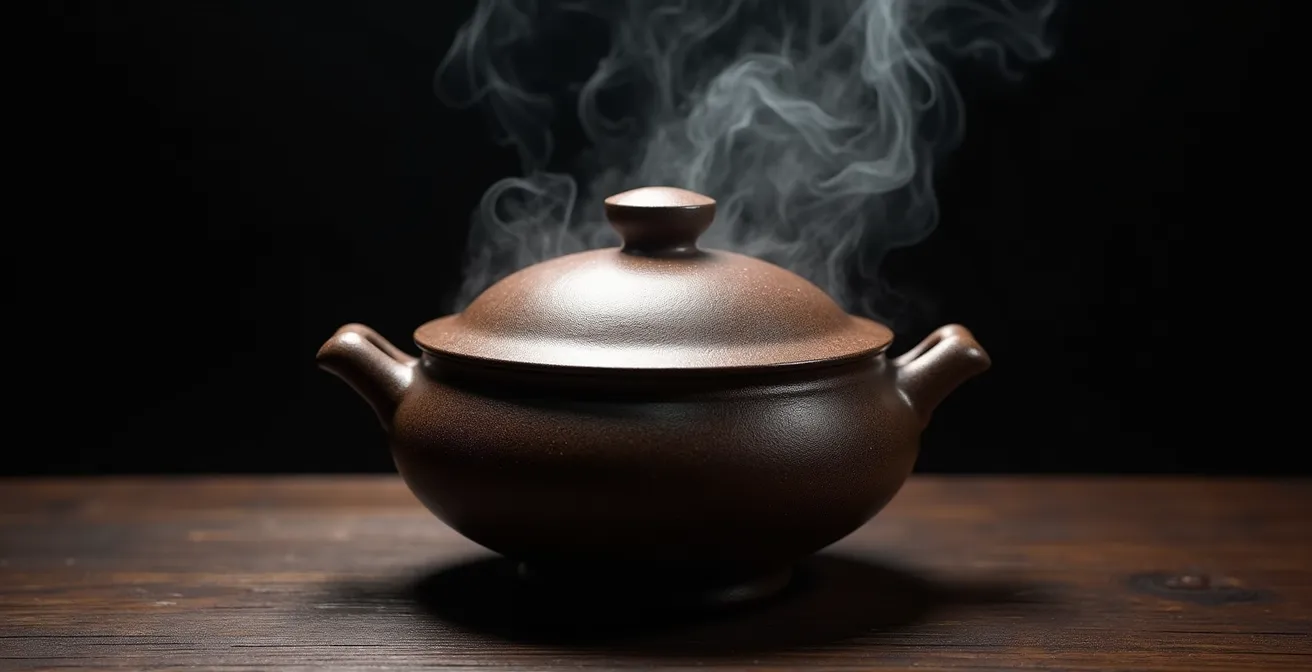
While a rice cooker maintains temperature through active, electronic control, a donabe does so through its inherent thermal mass. For holding shari at the perfect body temperature for immediate use, the donabe’s gentle, radiant heat is arguably superior, as it avoids the slight “baking” effect that some keep-warm functions can produce. However, for holding rice for longer periods with absolute consistency, the technology of a high-end rice cooker is unmatched.
Why Your Rice Becomes Mushy When Mixed With Vinegar Too Slowly?
The moment you combine freshly cooked rice with seasoned vinegar is one of the most chemically volatile stages in making shari. The speed and technique of this process are paramount to preventing a textural catastrophe. When rice is cooked, its starch granules swell and gelatinize, making them plump but also incredibly delicate. Introducing the acidic sushizu too slowly while the rice is steaming hot triggers a destructive reaction.
The combination of prolonged heat, moisture from the steam, and the liquid vinegar creates an environment where the fragile, gelatinized starch on the grain’s surface begins to break down completely. The starch molecules lose their structure and dissolve, forming a sticky paste that coats the other grains. This is why rice that is stirred slowly or left to sit with unmixed pools of vinegar turns into a cohesive, mushy clump. The grain integrity is compromised at a molecular level.
The solution is speed and proper technique. The sushizu must be distributed as quickly and evenly as possible while the rice is still hot enough to absorb it, but before the starches have time to break down. This is where the “cut-and-fold” method becomes essential. By using a slicing motion, you separate the grains and create channels for the vinegar to penetrate, then gently fold the rice to incorporate it without crushing. This minimizes physical damage while maximizing the speed of absorption. The acid in the vinegar then works to quickly tighten the surface of each grain, locking in its shape and preventing it from becoming mushy.
How to Use a Wooden Ohitsu to Regulate Rice Humidity and Heat?
Once the rice is cooked and seasoned, its journey is not over. The final holding vessel plays a crucial role in developing the perfect texture, and for centuries, the gold standard has been the ohitsu—a traditional Japanese container made from unfinished wood, typically Sawara cypress. Its function is far more sophisticated than simply holding rice; it is an active humidity and temperature regulation system.
The magic of the ohitsu lies in the natural properties of the wood. As GO TOKYO’s official guide states, “Traditional wooden ohitsu containers gently absorb excess moisture while retaining warmth, keeping each grain fluffy and delicious until it reaches the table.” When hot, steaming rice is transferred into a pre-moistened ohitsu, the wood immediately begins to absorb any excess surface moisture that would otherwise cause the grains to become sticky or waterlogged. This wicking action is what keeps the rice fluffy and distinct.
Simultaneously, the wood acts as a superb insulator. It traps the radiant heat from the rice, keeping it at an ideal warm temperature without any external heat source. Unlike a sealed container, which would trap steam and lead to condensation, the ohitsu is breathable. It maintains a perfect equilibrium of humidity, preventing the rice from either drying out or becoming soggy. To use it properly, the inside of the ohitsu should be briefly rinsed with cold water and wiped down before adding the hot rice. This prevents the rice from sticking and “primes” the wood for moisture absorption. The fitted wooden lid is then placed on top to complete the self-regulating environment.
Key Takeaways
- Starch Control is Paramount: The primary goal is to remove excess surface amylopectin (the “milky” water) while preserving the grain’s internal amylose for structural integrity.
- Hydration is a Science: Even hydration, achieved through proper soaking, is more important than cooking time. Colder water allows for a longer, more gentle soak.
- Anticipate Absorption: When making sushi rice, use less water during the initial cook to leave capacity for the rice to absorb the seasoned vinegar later.
Why the ‘Cut-and-Fold’ Mixing Motion Prevents Mushy Rice?
The “cut-and-fold” motion, performed with a wooden paddle (shamoji), is the final and most crucial technique for preserving the texture of seasoned rice. It is a method born from a deep understanding of the grain’s fragility after cooking. Simply stirring the rice with a spoon would be disastrous; the pressure and shearing force would crush the swollen, gelatinized grains against one another, releasing their internal starch and creating a sticky, porridge-like consistency.
The technique is a two-part motion. The “cut” involves inserting the edge of the shamoji into the rice at a 45-degree angle and slicing through a section. This motion separates the rice into masses without applying downward pressure, creating channels for air to circulate and for seasonings like vinegar to be distributed evenly. It breaks up clumps without crushing the individual grains, respecting their newly formed, delicate structure.
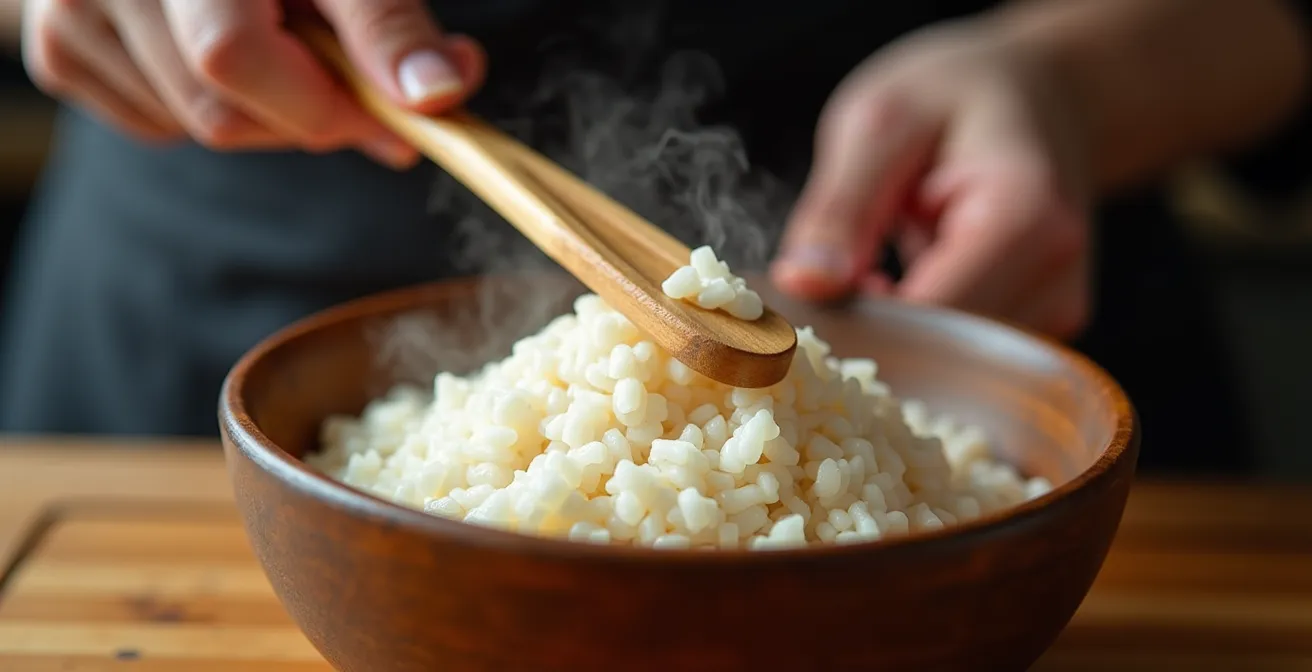
The “fold” follows immediately. The flat side of the paddle is used to lift the cut section of rice from the bottom of the bowl and gently turn it over onto the top. This movement gently incorporates the seasoning and cools the rice uniformly without mashing it. The process is repeated across the entire bowl until the sushizu is fully absorbed and the rice has a glossy sheen. The combination of cutting and folding is the most efficient way to handle the grains gently, ensuring that the final product remains a collection of distinct, perfectly intact grains. The integrity of rice with a lower 10.76% to 11.85% amylose range is particularly dependent on this gentle handling.
Now that every stage has been deconstructed, from rinsing to mixing, the path to perfect rice is clear. It is a discipline built on observation and an understanding of the scientific principles at play. For a complete mastery of the topic, it is essential to never forget the principles of starch management, which begins with the very first wash.